Why Do Stone Floors Turn Dull (Even When They’re “Clean”)?
Stone floors lose their luster for specific reasons that regular cleaning often worsens rather than improves. Understanding these causes helps you avoid common mistakes when you clean stone floors.Micro-Scratches from Grit and Sand
Dirt particles act like sandpaper on stone surfaces. Every footstep grinds these abrasive particles against your floor, creating microscopic scratches that accumulate over time. These tiny scratches scatter light instead of reflecting it uniformly, resulting in a dull appearance even on recently cleaned surfaces.Acid Etching on Sensitive Stones
Marble, limestone, and travertine react chemically with acidic substances. Common household cleaners, citrus spills, and even some tap water can cause etching. This chemical reaction removes the polished layer of stone, leaving behind dull spots that cleaning cannot fix. The damage appears as light-colored marks or rings that feel rougher than the surrounding areas.Cleaner Residue and Product Overuse
Using too much cleaning product creates a film that attracts dirt and dulls stone surfaces. Soap buildup occurs gradually, layer by layer, until your floors develop a cloudy appearance. Many all-purpose cleaners contain additives that leave residue, making floors look worse after cleaning than before.Hard Water Minerals and Haze
Mineral deposits from hard water create a chalky film on stone surfaces. This haze becomes more noticeable on dark stones like granite or black marble. The minerals bond to the stone surface, requiring specific removal techniques beyond standard cleaning.Distinguishing Between Worn Sealer and Damaged Stone
Worn sealer appears as an inconsistent sheen across your floor, with some areas looking duller than others. Damaged stone shows physical changes like etching, scratches, or pitting. This distinction matters because resealing fixes the former, while the latter requires professional restoration.ALSO READ: Non Slip Bathroom Floor Tiles: What to Buy in 2026
Step-by-Step: Best Way to Clean Stone Floors
Following the correct sequence when learning how to clean stone floors prevents damage while maintaining maximum shine.1) Dry Dust-Mop First (The Step Most People Skip)
Start with a microfiber dust mop to remove loose dirt and debris. This crucial step prevents scratching during wet mopping. In high-traffic areas, dust mopping should occur daily. Microfiber attracts and holds particles better than traditional mops, preventing them from redistributing across your floor.2) Use a pH-Neutral Stone Cleaner (Not All-Purpose)
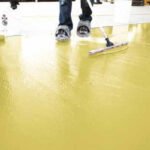
pH neutral cleaner for natural stone maintains a 7 on the pH scale, neither acidic nor alkaline. This balance preserves your stone’s integrity without causing chemical reactions. Mix the cleaner according to the manufacturer’s directions, as over-concentration leaves residue while under-dilution reduces effectiveness. The right dilution ratio typically ranges from 1:16 to 1:32 for regular maintenance cleaning.3) Damp Mop, Not Wet Mop
Excessive water penetrates stone pores and grout lines, potentially causing damage and discoloration. Use the two-bucket method: one for cleaning solution, another for rinse water. Wring your mop until barely damp. Change both buckets frequently to avoid spreading dirty water across clean areas. Work in sections, overlapping slightly to ensure complete coverage without oversaturating any area.4) Rinse if Needed and Dry/Buff
Some pH-neutral cleaners require rinsing, while others don’t. Check product instructions carefully. After mopping, use a clean, dry microfiber cloth to buff the surface. This final step removes any remaining moisture and prevents water spots or streaking, revealing your stone’s natural shine.Products and Tools That Are Safe (and What to Avoid)
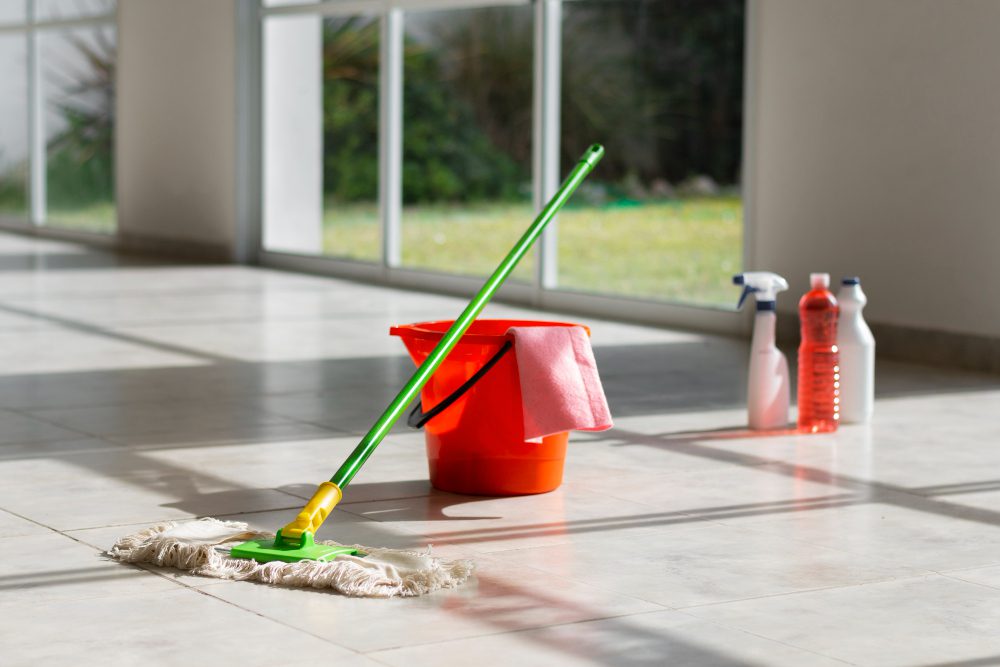
Safe Tools for Stone Floor Care
Microfiber mops provide gentle, effective cleaning without scratching. Soft-bristle brushes work for textured surfaces like slate. Vacuums with hard floor settings prevent scatter while removing debris. Chamois or terry cloth towels excel at drying and buffing.Safe Cleaners for Natural Stone
Quality pH-neutral stone cleaners contain no acids, ammonia, or harsh detergents. Look for products specifically formulated for natural stone that won’t strip sealers or etch surfaces. Concentrated formulas offer better value and reduce plastic waste. Always verify the product specifies safety for your stone type.Products to Avoid
Never use vinegar on stone floors, despite its popularity as a natural cleaner. Bleach, ammonia, and degreasers cause permanent damage to many stone types. Powdered abrasive cleaners scratch polished surfaces. Oil soaps leave residue that attracts dirt. Acrylic “shine” products create temporary gloss but yellow over time and prevent proper stone breathing.Stone-Specific Cleaning Notes (Quick Guide)
Marble / Limestone / Travertine
These calcium carbonate stones require extra care due to acid sensitivity. Even mild acids cause immediate etching. Use only cleaners specifically labeled safe for marble. Blot spills immediately, especially wine, coffee, or citrus. Consider professional sealing every 12 to 24 months.Granite
Granite resists etching better than marble but still requires proper care. Avoid alkaline cleaners that cause hazing. Though durable, granite can absorb oils and liquids through micro-fissures. Clean spills promptly and maintain sealer integrity for best results.Slate
The cleft texture of slate traps dirt in crevices. Use a soft brush with your pH-neutral cleaner to reach recessed areas. Avoid wax-based products that build up in texture variations. Some slates benefit from color-enhancing sealers that deepen natural hues.Terrazzo
Terrazzo combines marble chips with cement or resin binders. Use neutral cleaners exclusively, as harsh alkalines damage the binder. Avoid acids that etch marble components. Regular diamond polishing maintains terrazzo’s signature shine better than topical products.Can You Use a Steam Mop on Stone Floors?
Steam mopping poses risks to natural stone installations. High temperatures combined with moisture can compromise sealers, loosen tiles, and damage grout. Weak or cracked grout allows steam penetration beneath tiles, potentially causing lifting or discoloration. Temperature shock from steam can stress certain stones, particularly in older installations.Safer alternatives include spray mopping with a proper stone cleaner or using a barely damp microfiber mop. These methods clean effectively without heat-related risks.How to Fix Dull Spots (Cleaning Won’t Fix These)
Removing Residue Buildup
If dullness results from product buildup, use a stone-safe stripper following the manufacturer’s instructions. Apply stripper, allow dwell time, then agitate gently with a soft brush. Remove completely with clean water and dry thoroughly. This process may require multiple applications for heavy buildup.Addressing Etching and Scratches
Etching and scratches require mechanical polishing or honing. Diamond polishing pads in progressively finer grits restore shine to small areas. Larger areas need professional equipment and expertise. Attempting DIY restoration on valuable stone often worsens damage.When Professional Help Makes Sense
Call professionals when dealing with widespread etching, deep scratches, or valuable installations. Professional restoration costs less than replacement and achieves results impossible with consumer-grade tools. Old Stone Restoration & Installation Corp. specializes in bringing dull, damaged stone back to life with Stone Restoration Service.Maintenance Routine to Keep Stone Shiny Longer
- Daily: Dust mop high-traffic areas. Clean spills immediately with pH-neutral cleaner.
- Weekly: Damp mop the entire floor with proper stone cleaner. Check and clean doormats.
- Monthly: Deep clean with the two-bucket method. Inspect for damage or wear patterns. Clean under furniture and along baseboards.
- Annually: Professional inspection and resealing if needed. Address minor repairs before they worsen.