Before You Start: Check Conditions and Gather Tools
- Concrete age and condition: New pours should cure at least 28 days. Epoxy bonds best to clean, sound, dry concrete.
- Tools and supplies: Vacuum with fine dust filter, stiff brooms, mop, floor grinder or etching supplies, crack/patch materials, squeegee, 3/8″–1/2″ nap rollers, mixing buckets, drill/paddle, tape, plastic sheeting, gloves, eye protection, respirator.
- Temperature and humidity: Most epoxies prefer 60–80°F and moderate humidity. Follow your product’s technical data sheet.
Step‑by‑step Surface Preparation
Step 1: Clear the space: Remove all items. Mask baseboards, walls, thresholds, and drains.Step 2: Check for sealers/contaminants:- Water test: If water beads, there’s sealer or oil that must be removed.
- Removal: Mechanical grinding or shot‑blasting is most reliable. If you acid‑etch, neutralize and rinse thoroughly. Aim for CSP 2–3 profile.
- Use an alkaline degreaser on oil spots; scrub and rinse until water runs clear.
- Stubborn oil may require poultice products or additional grinding.
- Do a taped plastic sheet test (2’×2′ for 24 hours) or use calcium chloride/in‑slab RH testing.
- If moisture is high, use a moisture‑mitigation epoxy primer or address vapor issues first.
- Fill cracks, spalls, and divots with compatible epoxy or polyurea patch compounds.
- Feather edges are smooth. Do not rigidly fill active control/expansion joints; honor them or use flexible joint material later.
- Grind or etch to open pores.
- Vacuum meticulously; residual dust can cause peeling.
- Wipe with a manufacturer‑approved, solvent‑free cleaner if specified
What To Expect During The Process
Mixing and pot life:
- Epoxy is two‑part; measure and mix precisely.
- Observe any induction time and watch pot life, warmer temps shorten working time. Mix manageable batches.
Primer coat:
- Improves bond, reduces pinholes, and helps with outgassing.
- Apply with a squeegee and backroll evenly. Use de‑foaming rollers if recommended.
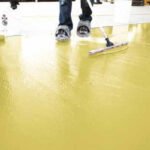
Base coat and decorative flakes (optional):
- Roll the base coat in sections, maintaining a wet edge.
- Broadcast flakes “to rejection” while wet. After cure, scrape and vacuum excess.
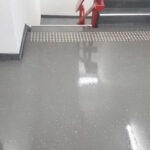
Topcoat:
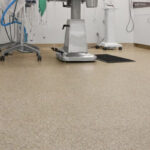
- Seal with clear epoxy, polyurethane, or polyaspartic for UV, scratch, and chemical resistance.
- Add anti‑slip aggregate for wet areas. Crisscross backrolling helps avoid holidays and roller marks.
Cure times:
- Light foot traffic: 12–24 hours.
- Replace items: 48–72 hours.
- Vehicle traffic: 3–7 days (product and conditions vary).
- Keep temperatures stable; avoid washing or covering during early cure.
Odor, noise, and dust:
- Expect grinder noise and some dust during prep (use quality vacuums).
- Coatings can have noticeable odor, So, ventilate and use PPE
Common Pitfalls To Avoid
- Coating over moisture, oil, or sealer contamination.
- Skipping mechanical profiling or inadequate cleaning.
- Working outside the product’s temperature/humidity range.
- Missing recoat windows or over‑rolling partially cured epoxy. Ignoring control/expansion joints.
Precautions and Aftercare
- Sweep and mop with a neutral cleaner; avoid harsh acids and abrasives.
- Use mats at entries and under kickstands or jacks to prevent point loading.
- Re‑topcoat as needed to refresh gloss and protection.