What Is Epoxy Garage Floor Paint?
Epoxy garage floor paint is a two-component system made up of a resin and a hardener. When mixed together, a chemical reaction occurs that produces a rigid, plastic-like coating that bonds directly to concrete. This is fundamentally different from latex or oil-based floor paints, which simply dry on the surface without forming a true chemical bond.How Epoxy Paint Differs from Standard Floor Paint?
Standard floor paint sits on top of the concrete and can be scraped, peeled, or worn through relatively quickly. Epoxy coating penetrates the concrete surface and cures into a hard, cross-linked film. The result is a surface that is significantly harder, more resistant to chemicals, and more durable under vehicle traffic and heavy use.Benefits of Epoxy Flooring
Chemical resistance: Epoxy coatings stand up to oil, gasoline, antifreeze, and cleaning chemicals without staining or degrading.Durability: A properly installed garage floor epoxy paint system withstands vehicle traffic, foot traffic, and heavy equipment for a decade or more with basic maintenance.Easy maintenance: The smooth, sealed surface resists dirt and moisture, making routine cleaning fast and simple.Improved appearance: Epoxy coatings are available in dozens of colors and can be finished with decorative flakes or metallic effects for a professional, polished look.Increased property value: A clean, finished garage floor adds visual appeal and perceived value to residential and commercial properties alike.Is Epoxy Paint the Right Choice for Your Garage Floor?
Epoxy is an excellent choice for most residential garages and many light commercial applications. However, it is not the right system for every situation.Ideal conditions for epoxy flooring include concrete that is structurally sound, free from major cracking, and has low to moderate moisture levels. The floor should be relatively flat and free from oil contamination that has penetrated deep into the slab.Epoxy may not be the best fit in the following situations:- Heavy industrial environments with constant forklift traffic or extreme chemical exposure
- Concrete with ongoing moisture vapor transmission from below
- Floors with severe impact conditions or heavy mechanical loading
When to Consider Epoxy Urethane Mortars?
For floors that have sustained significant damage, spalling, or deep surface irregularities, standard epoxy paint alone will not hold up. Epoxy urethane mortar systems are heavy-duty flooring solutions designed to repair and resurface damaged concrete while delivering exceptional impact resistance, chemical protection, and long-term performance. These systems are thicker and more structurally robust than standard coatings, making them the right choice for commercial kitchens, warehouses, manufacturing floors, and other demanding environments.Old Stone Restoration & Installation Corp installs industrial-grade epoxy urethane mortar systems for clients across a range of industries where floor performance cannot be compromised.Tools and Materials Needed
Essential Tools
- Floor grinder or diamond grinder (for surface preparation)
- Pressure washer
- Concrete degreaser and cleaner
- Crack filler or concrete patching compound
- Drill with mixing paddle
- Squeegee
- Paint roller with extension pole
- Paint tray and brushes for edge work
Safety Equipment
- Chemical-resistant gloves
- Respirator rated for chemical vapors
- Safety glasses or goggles
- Slip-resistant footwear
How to Prepare a Garage Floor Before Applying Epoxy Paint?
Surface preparation is the single most important factor in a successful epoxy garage floor installation. A floor that is not properly prepared will cause the coating to peel, bubble, or fail within months, regardless of product quality.Remove Everything from the Garage
Clear the entire space before starting. This includes vehicles, shelving units, storage boxes, and any mounted equipment near the floor. The entire slab needs to be accessible.Clean Oil, Grease, and Dirt
Use a dedicated concrete degreaser to break down oil and grease stains. Apply the cleaner, scrub with a stiff-bristle brush, and rinse thoroughly with a pressure washer. Any oil contamination left on the surface will prevent the epoxy from bonding properly.Repair Cracks and Surface Damage
Fill cracks wider than a hairline with a polyurethane or epoxy-based crack filler. Allow the material to cure fully according to the product instructions before proceeding. For floors with significant spalling or deep damage, a resurfacing product or mortar system may be required before the epoxy coat is applied.Test for Moisture Problems
Tape a 16-by-16-inch sheet of plastic to the floor and seal all four edges with tape. Leave it in place for 24 hours. If moisture collects beneath the plastic, the slab has a moisture problem that must be addressed before epoxy application. Installing epoxy over a damp slab is one of the most common causes of coating failure.Grind or Etch the Concrete Surface
The concrete surface must be opened up so the epoxy can penetrate and bond. A floor grinder with a diamond disc produces the most consistent results and is the preferred method for professional installers. Acid etching is an alternative method sometimes used for DIY applications, though grinding produces a more reliable surface profile.Vacuum and Final Cleaning
After grinding or etching, vacuum the entire floor thoroughly to remove all concrete dust and debris. Follow up with a damp mop and allow the floor to dry completely before applying any product.How to Apply Epoxy Paint to a Garage Floor?
Step 1: Read Product Instructions Carefully
Every epoxy product has specific mixing ratios, pot life, temperature requirements, and recoat windows. Read the full instructions before opening any containers. Deviating from manufacturer guidelines is a direct path to application failure.Step 2: Mix the Epoxy Components Properly
Combine Part A (resin) and Part B (hardener) in the exact ratio specified on the product label. Use a mixing paddle attached to a drill and mix thoroughly for the full recommended time, typically two to three minutes. Incomplete mixing results in soft spots and uneven curing.Step 3: Apply the Primer Coat
A primer coat seals the concrete and improves adhesion for the epoxy layers that follow. Many epoxy systems use a diluted version of the base coat as a primer. Apply it with a roller, working it into the surface. Why primer matters: without a primer coat, the topcoat can delaminate or show uneven gloss levels, particularly on porous concrete.Step 4: Cut In Around Edges
Use a brush to apply epoxy along the perimeter of the garage, around floor drains, and near any transitions. Cutting in first allows the roller to move quickly through the open floor area without stopping at edges.Step 5: Apply the First Epoxy Coat
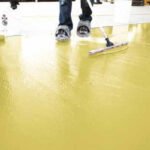
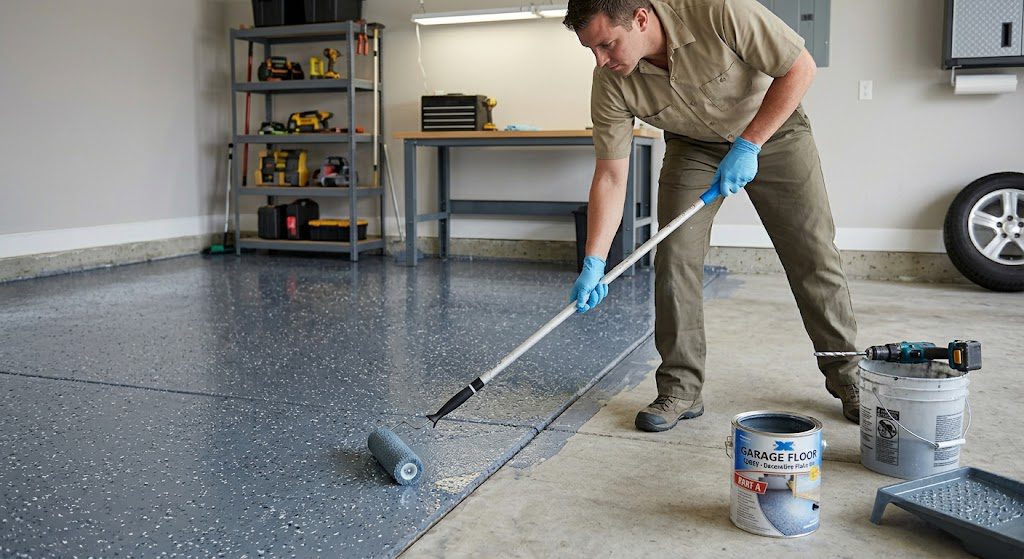
Pour the mixed epoxy into a paint tray and apply with a 3/8-inch nap roller. Work in sections, starting from the farthest corner and moving toward the garage door exit so the floor is never stepped on after coating. Maintain a wet edge throughout to avoid lap marks.Step 6: Add Decorative Color Flakes (Optional)
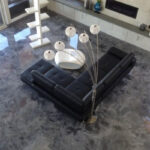
If using vinyl color flakes, broadcast them into the wet first coat immediately after rolling. Toss the flakes lightly from knee height to achieve even distribution. A full broadcast creates a heavily textured surface; a partial broadcast gives a more subtle decorative effect.Step 7: Apply the Second Coat
Once the first coat has reached the recoat window specified by the manufacturer, apply a second full coat using the same technique. The second coat builds film thickness and eliminates any thin spots left by the first pass.Step 8: Add a Protective Topcoat
A topcoat seals the surface and adds UV resistance, abrasion resistance, and a finished sheen. Polyaspartic topcoats cure faster and offer excellent UV stability, making them a strong choice for garages with sunlight exposure. Urethane topcoats provide outstanding chemical and abrasion resistance and are commonly used in commercial settings. Both should be applied in thin, even passes to avoid runs or sags.Common Mistakes That Cause Epoxy Floors to Fail
- Applying epoxy over damp or moisture-compromised concrete
- Skipping or rushing surface preparation, including degreasing and grinding
- Incorrect mixing ratios between resin and hardener
- Applying epoxy in temperatures below 50 degrees Fahrenheit or above 90 degrees Fahrenheit
- Not allowing adequate cure time between coats or before vehicle traffic
- Using consumer-grade or low-quality epoxy products that lack the film thickness and chemical resistance of professional-grade systems
DIY vs Hiring an Epoxy Floor Contractor
DIY epoxy garage floor kits are widely available at home improvement stores and can be a reasonable option for small garages with sound, clean concrete and owners comfortable with detailed preparation work. The upfront cost is lower, but the risk of failure is higher without professional equipment and experience.Professional epoxy flooring installation offers a higher-quality finish, faster completion, and significantly better long-term durability. Professional contractors have access to commercial-grade products that are not sold at retail, and they bring the surface preparation equipment needed to do the job right the first time.When does DIY make sense?- Small single-car garage with clean, sound concrete
- Low budget with tolerance for a shorter product lifespan
- Owner has prior experience with surface prep and coatings
- Larger garages or commercial floors where failure means a costly redo
- Concrete with existing damage, cracks, or moisture issues
- Projects requiring industrial-grade coatings or decorative finishes
- Any situation where the floor needs to perform under heavy traffic or chemical exposure
How Long Does Epoxy Garage Flooring Last?
A professionally installed epoxy garage floor typically lasts between 10 and 20 years with proper maintenance. DIY applications using consumer-grade products may last 3 to 5 years before requiring recoating.Factors that affect lifespan include:- Traffic levels: Floors under daily vehicle traffic wear faster than those in lightly used garages
- Preparation quality: Floors with thorough surface prep last significantly longer
- Maintenance habits: Prompt cleanup of chemical spills and regular cleaning extend the coating life
- Product quality: Commercial-grade epoxy systems outperform retail kits in film thickness and chemical resistance
Garage Floor Maintenance Tips
Weekly cleaning: Sweep or dust mop the floor weekly to prevent grit and debris from grinding into the surface. A pH-neutral cleaner and a mop work well for routine wet cleaning.Removing chemical spills: Clean up oil, gasoline, and chemical spills as soon as they occur. Most spills wipe up easily from a cured epoxy surface with a paper towel and a mild cleaner. Prolonged contact can cause staining or surface softening depending on the product.Protecting against tire marks: Hot tire pick-up is a common issue with standard epoxy. Using a polyaspartic or urethane topcoat greatly reduces tire marking. Parking mats placed under tires also provide protection during hot weather.When to recoat: Watch for areas where the finish has worn thin, especially near the garage door and in vehicle wheel paths. Spot recoating or a full recoat before the coating wears through to bare concrete extends the overall floor life considerably.Epoxy Flooring Cost for Garage Floors
DIY cost breakdown: A standard two-car garage epoxy kit from a home improvement store typically runs between $100 and $300 for basic products. Add equipment rentals, concrete cleaner, crack filler, and topcoat products, and the total project cost usually falls between $300 and $600.Professional installation cost factors: Professional epoxy flooring for a residential garage generally ranges from $3 to $12 per square foot depending on the coating system, surface condition, and decorative options selected.What impacts pricing:- Garage size: Larger floors reduce cost per square foot due to economies of scale
- Surface repairs: Significant crack repair, spalling repair, or moisture mitigation adds to the project cost
- Coating system: Basic solid-color systems cost less than multi-layer systems with decorative flakes and urethane topcoats
- Decorative finishes: Metallic, quartz broadcast, and custom color systems carry a premium over standard solid-color coatings
Signs the Floor Needs More Than Epoxy Paint
Standard epoxy paint is not a repair product. Applying it over structural problems will not fix them and will likely accelerate coating failure. Watch for these warning signs:- Large cracks running across the slab that indicate movement or foundation settlement
- Surface spalling, where chunks of concrete are breaking away from the surface
- Uneven concrete with height differences of more than 1/4 inch across the floor
- Industrial wear patterns where forklift or heavy equipment traffic has ground down the concrete
Why Choose Old Stone Restoration & Installation Corp for Epoxy Flooring?
Old Stone Restoration & Installation Corp brings 35 years of hands-on experience in concrete floor installation, restoration, and coating systems to every project. That depth of experience translates into correct product selection, proper surface preparation, and finished floors that hold up over time.- Residential and commercial expertise across a wide range of project types and environments
- Access to industrial-grade epoxy and urethane mortar systems not available through retail channels
- Comprehensive surface preparation including diamond grinding, moisture testing, and crack repair
- Customized flooring solutions matched to the specific demands of each client’s space
- A long-term performance focus that prioritizes durability over quick, inexpensive shortcuts