Cracked concrete often feels like a dealbreaker. Many homeowners and business owners look at the lines running across their garage floor or warehouse slab and assume the only option is to tear everything out and start fresh. That assumption can lead to unnecessary expense and frustration.
Most concrete cracks are repairable, and epoxy floor installation can be directly applied over them once the surface is properly prepared. The key lies in understanding what type of crack exists, whether it is still moving, and how deep the damage goes.
With over 35 years of experience, Old Stone Restoration and Installation Corp. has restored and coated concrete surfaces ranging from residential garages to commercial facilities across Long Island. That kind of hands-on knowledge matters when dealing with cracked concrete.
Quick Answer:
Yes, epoxy flooring can be installed over cracked concrete in most cases. Small cracks and surface cracks can usually be repaired before the epoxy is applied. However, large cracks, moving cracks, or cracks caused by foundation problems should be fixed first. When the concrete is properly repaired and prepared, epoxy flooring creates a strong, smooth, and long-lasting surface for garages, basements, warehouses, and other spaces.
According to the Portland Cement Association, understanding crack type and movement is essential before applying any protective coating (PCA – Concrete Crack Evaluation).
Coating over moving cracks often leads to failure, while dormant cracks typically accept repairs and coatings without issue.
Here is a quick reference for common crack types:
Crack Type
Can Epoxy Be Installed?
Hairline Crack
Yes
Shrinkage Crack
Yes
Surface Crack
Yes
Settlement Crack
Sometimes
Structural Crack
Requires repair first
Active or Moving Crack
This is not recommended until stabilized
Fresh concrete contains water. As that water evaporates during the curing process, the slab shrinks slightly. This shrinkage can create fine cracks that appear within the first few months after pouring.
Heavy Vehicle Traffic
Garages, warehouses, and industrial floors endure constant weight from vehicles, forklifts, and heavy equipment. Over time, this repeated stress can cause surface cracking, especially in areas where the concrete was poured too thin or without proper reinforcement.
Soil Movement and Settlement
The ground beneath the concrete is not always stable. Clay soils expand when wet and shrink when dry. This movement can cause the overlying slab to shift, leading to cracks at weak points.
Moisture Changes
Water seeping under a slab can erode the supporting base material. When that support disappears, sections of concrete may sink or crack under normal use.
Freeze Thaw Cycles
In colder climates like Long Island, water trapped in concrete pores expands when it freezes. Repeated freeze-and-thaw cycles can cause surface spalling and deeper cracking over multiple winters.
Poor Original Installation
Concrete mixed with too much water, poured over improperly compacted soil, or cured too quickly tends to develop cracks earlier than properly installed slabs.
Which Cracks Are Safe for Epoxy Flooring Installation?
Hairline Cracks
These tiny lines are usually cosmetic. They rarely compromise structural integrity and respond well to simple crack filling prior to epoxy application.
Minor Surface Cracks
Common in older epoxy garage floors, these shallow cracks typically stay stable over time. After cleaning and filling, they make excellent candidates for epoxy coating.
Dormant Cracks
Industry guidance commonly notes that dormant or static cracks can be repaired and coated successfully when properly prepared. If a crack has not changed in size or shape over several months, it is likely dormant and ready for treatment.
Which Cracks Need Professional Repair Before Epoxy Flooring?
Structural Cracks
Wide cracks that run deep into the slab may indicate foundation issues. These require evaluation by a qualified professional before any coating work begins.
Wide Cracks
Cracks wider than a quarter inch often need more than simple filling. Epoxy mortar or specialized repair compounds may be necessary to restore surface integrity.
Active Cracks
If a crack is still moving due to ongoing soil settlement or structural stress, coating over it will only hide the problem temporarily. The crack will likely reappear through the epoxy layer.
Foundation Related Cracks
Cracks that appear near load-bearing walls or in patterns suggesting foundation movement need structural attention first.
Moisture-Damaged Concrete
Concrete that stays damp, shows efflorescence, or has visible water intrusion often indicates drainage problems that must be resolved before epoxy installation.
Important Note: Applying epoxy directly over moving cracks can result in visible cracking, peeling, or delamination later. Proper repair and stabilization must happen first.
How Professionals Repair Cracked Concrete Before Installing Epoxy Flooring
This step-by-step process separates professional epoxy flooring service from quick DIY attempts that often fail within a year or two.
Step 1: Detailed Concrete Inspection
A thorough walkthrough identifies all cracks, spalled areas, and potential problem spots. This inspection determines what repairs are needed and whether the slab can support an epoxy coating.
Step 2: Moisture Testing
Excess moisture trapped in concrete causes epoxy to fail. Professional installers test moisture levels to ensure proper adhesion.
Step 3: Crack Cleaning
Cracks must be free of dust, debris, and loose material before repair compounds can bond properly. Wire brushing, vacuuming, and sometimes pressure washing accomplish this.
Step 4: Crack Filling
Depending on crack width and depth, professionals use epoxy fillers, polyurea compounds, or cementitious repair materials. Each product serves a different purpose.
Step 5: Surface Grinding
Diamond grinding removes the top layer of concrete, opening pores and creating a profile that allows epoxy to bond mechanically with the slab.
Step 6: Surface Profiling
The concrete surface needs a specific texture for optimal adhesion. Too smooth and the coating will not stick. Too rough and coverage becomes uneven.
Step 7: Final Epoxy Application
Multiple coats build up the final floor system. A primer coat penetrates the surface, followed by the body coat and a protective topcoat.
Professional installers typically repair cracks and mechanically prepare the slab before coating to improve adhesion and durability.
Will Cracks Show Through Epoxy Flooring?
This question comes up frequently, and the honest answer depends on several factors.
Repaired Hairline Cracks: Properly filled hairline cracks typically disappear completely under quality epoxy flooring. The repair material and coating create a seamless appearance.
Improperly Repaired Cracks: Cracks filled with the wrong material or without proper cleaning may show through or telegraph to the surface over time.
Moving Cracks: Real-world installers and users frequently note that movement joints and active cracks may remain visible or reappear over time because the concrete beneath the coating continues to move.
Control Joints: Intentional grooves cut into concrete to control where cracks form will typically remain visible through epoxy. Many property owners choose to fill these joints with a flexible sealant that allows continued movement without damaging the coating.
Can Epoxy Flooring Prevent Future Concrete Damage?
Once installed over properly prepared concrete, epoxy flooring service offers several protective benefits.
Chemical Resistance: Oil, gasoline, brake fluid, and common household chemicals sit on the surface rather than soaking into the concrete below.
Moisture Protection: A sealed epoxy surface prevents water penetration that can cause freeze-thaw damage or erosion of the underlying slab.
Abrasion Resistance: Heavy traffic, dropped tools, and dragged equipment cause less damage to epoxy-coated floors than bare concrete.
Easier Maintenance: Smooth epoxy surfaces clean quickly with regular sweeping and occasional mopping. Stains that would permanently mark bare concrete wipe away easily.
Improved Lifespan: By protecting concrete from the elements and daily wear, epoxy coating can extend a slab’s service life by many years.
What are the Key Signs your Concrete is too damaged for Epoxy Flooring?
Sometimes, concrete damage goes beyond what repair and coating can address.
Severe Structural Movement: Large sections of floor that have shifted significantly may need removal and replacement rather than repair.
Extensive Spalling: When large areas of concrete surface are flaking, the slab may lack the structural integrity needed to support an epoxy coating.
Major Foundation Problems: Cracks accompanied by bowing walls, sticking doors, or visible settlement indicate foundation issues that require structural repair before any cosmetic work.
Continuous Moisture Intrusion: Concrete that stays wet despite drainage improvements may need waterproofing treatment or slab replacement.
Large Uneven Sections: Sections of the floor that have sunk by more than an inch or two may require mudjacking or slab replacement to restore a level surface.
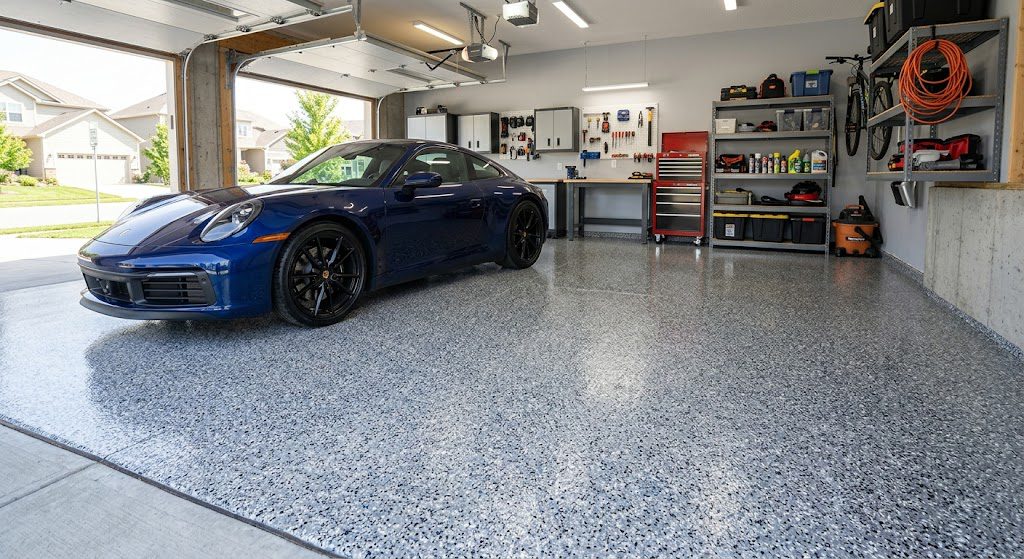
Residential Areas Where Epoxy Flooring Works Well Over Repaired Concrete
Garage Floors: The most common residential application. Garage floors endure vehicle traffic, chemical spills, and temperature swings that epoxy handles well.
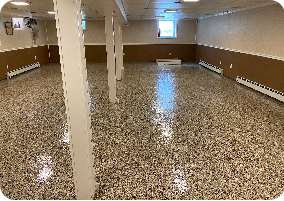
Basements: Properly treated basement floors become usable living space or storage areas protected from moisture and dust.
Patios: Exterior-rated urethane systems protect outdoor concrete from weather while adding visual appeal.
Utility Rooms: Laundry rooms and mechanical spaces stay cleaner and more organized with coated floors.
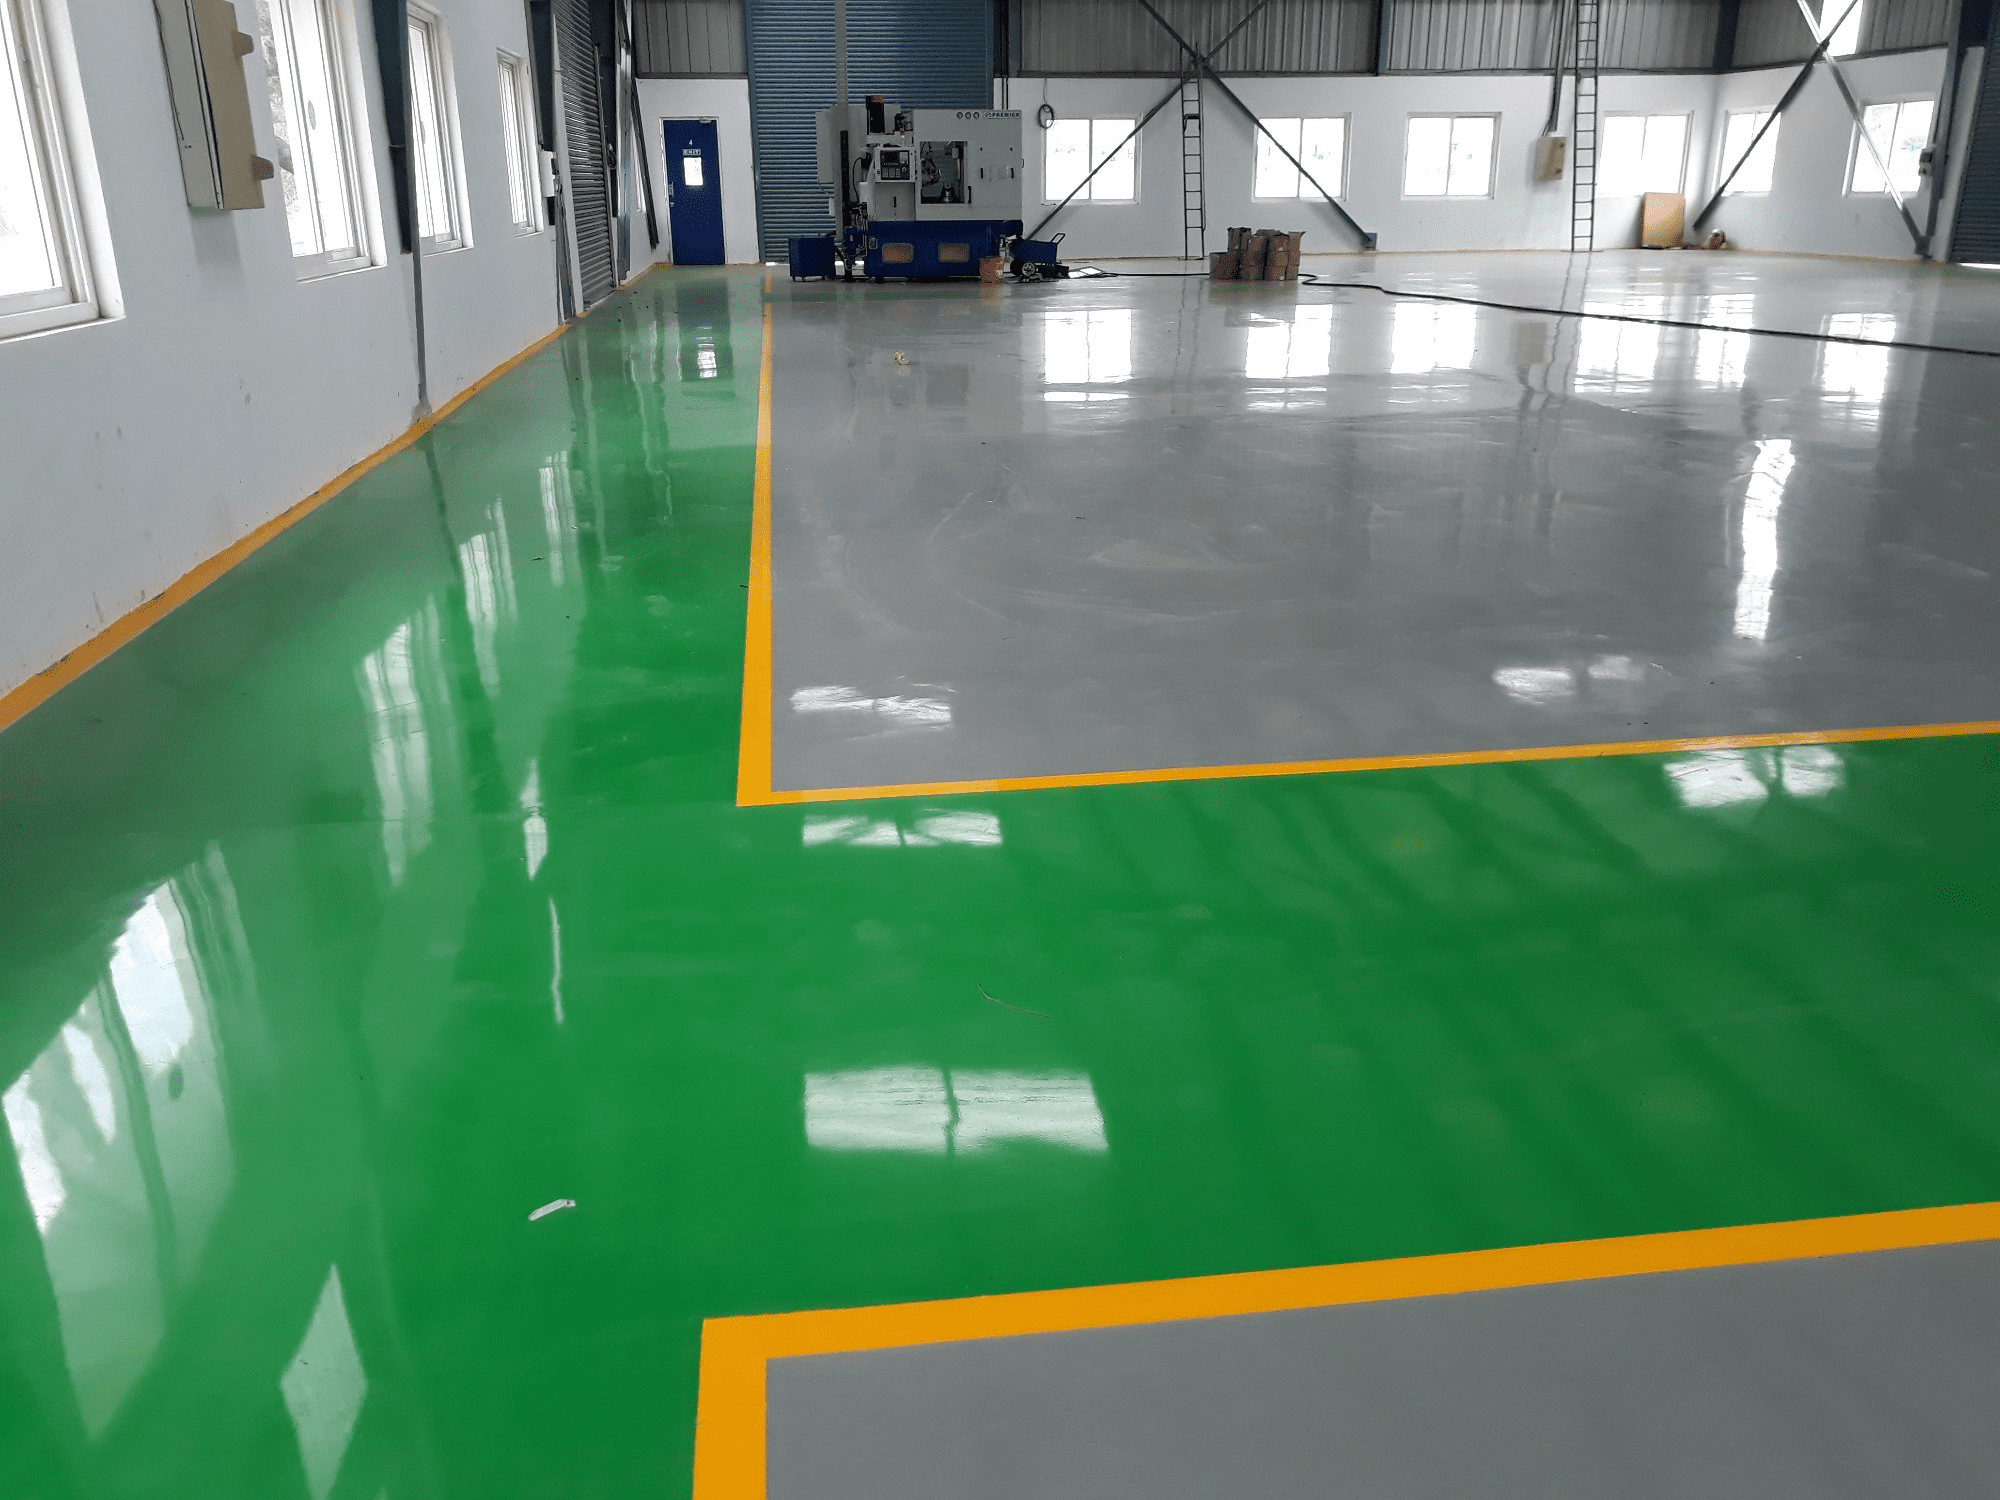
Commercial Spaces That Benefit from Epoxy Flooring
Warehouses: Heavy forklift traffic and constant product movement demand the durability that epoxy mortar systems provide.
Manufacturing Facilities: Chemical resistance and easy cleaning make epoxy ideal for production environments.
Retail Spaces: Attractive metallic garage floor or quartz broadcast systems create welcoming customer environments while withstanding foot traffic.
Restaurants: Commercial kitchen floors require sanitary, slip-resistant surfaces that meet health code requirements.
Automotive Facilities: Service bays and showrooms both benefit from chemical-resistant, easy-clean epoxy surfaces.
Why Hiring a Professional Epoxy Flooring Service Matters
Surface preparation equipment, crack assessment expertise, moisture testing capabilities, proper repair products, and application experience all contribute to long-term durability. Skipping any of these steps can lead to coating failure within months.
With 35 years of hands-on restoration and flooring experience, Old Stone Restoration and Installation Corp. understands how to evaluate cracked concrete and recommend the professional epoxy flooring solution for long-lasting results.
Why Choose Old Stone Restoration & Installation Corp for Epoxy Flooring?
Old Stone Restoration & Installation Corp brings 35 years of hands-on experience in concrete floor installation, restoration, and coating systems to every project. That depth of experience translates into correct product selection, proper surface preparation, and finished floors that hold up over time.
Residential and commercial expertise spans a wide range of project types and environments. The epoxy flooring service team has access to industrial-grade epoxy and urethane mortar systems not available through retail channels. Comprehensive surface preparation includes diamond grinding, moisture testing, and crack repair for every job.
Customized flooring solutions get matched to the specific demands of each space. A long-term performance focus prioritizes durability over quick, inexpensive shortcuts that fail within a few years.
Conclusion
Yes, epoxy flooring can be installed over cracked concrete in most situations. The key is proper inspection, accurate crack identification, and thorough surface preparation before any coating is applied.
Skipping preparation steps or coating over active cracks typically leads to peeling, visible crack lines, and premature failure. Taking the time to do it right the first time saves money and frustration down the road.
Old Stone Restoration & Installation Corp has installed and restored concrete floors for over 35 years, bringing the same standard of preparation and product quality to every project, regardless of size. Whether the project calls for a standard residential garage floor coating or an industrial-grade epoxy urethane mortar system built to withstand the toughest conditions, the team delivers floors that perform and last.
Contact Old Stone Restoration & Installation Corp. today to discuss the right epoxy flooring system for the project. Call (631) 821-5619 to request a consultation.
FAQs
Can epoxy flooring cover cracks completely?
Most hairline and minor surface cracks become invisible after proper filling and epoxy application. Larger or moving cracks may remain visible or reappear over time.
How large can a crack be before epoxy installation?
Cracks up to a quarter inch wide typically respond well to standard repair methods. Wider cracks may need epoxy mortar or specialized repair before coating.
Will cracks come back after epoxy flooring?
Dormant cracks that are properly repaired rarely reappear. Active cracks that continue to move may eventually telegraph through the coating.
Do I need to repair the cracks in the garage floor before applying epoxy?
Yes. Skipping crack repair often leads to coating failure. Even small cracks should be cleaned and filled before application.
How long does crack repair take?
Most residential crack repairs require 1 day to fill and cure before epoxy application can begin.
Is epoxy flooring better than replacing concrete?
In most cases involving repairable damage, epoxy coating over repaired concrete costs significantly less than full slab replacement while providing excellent results.
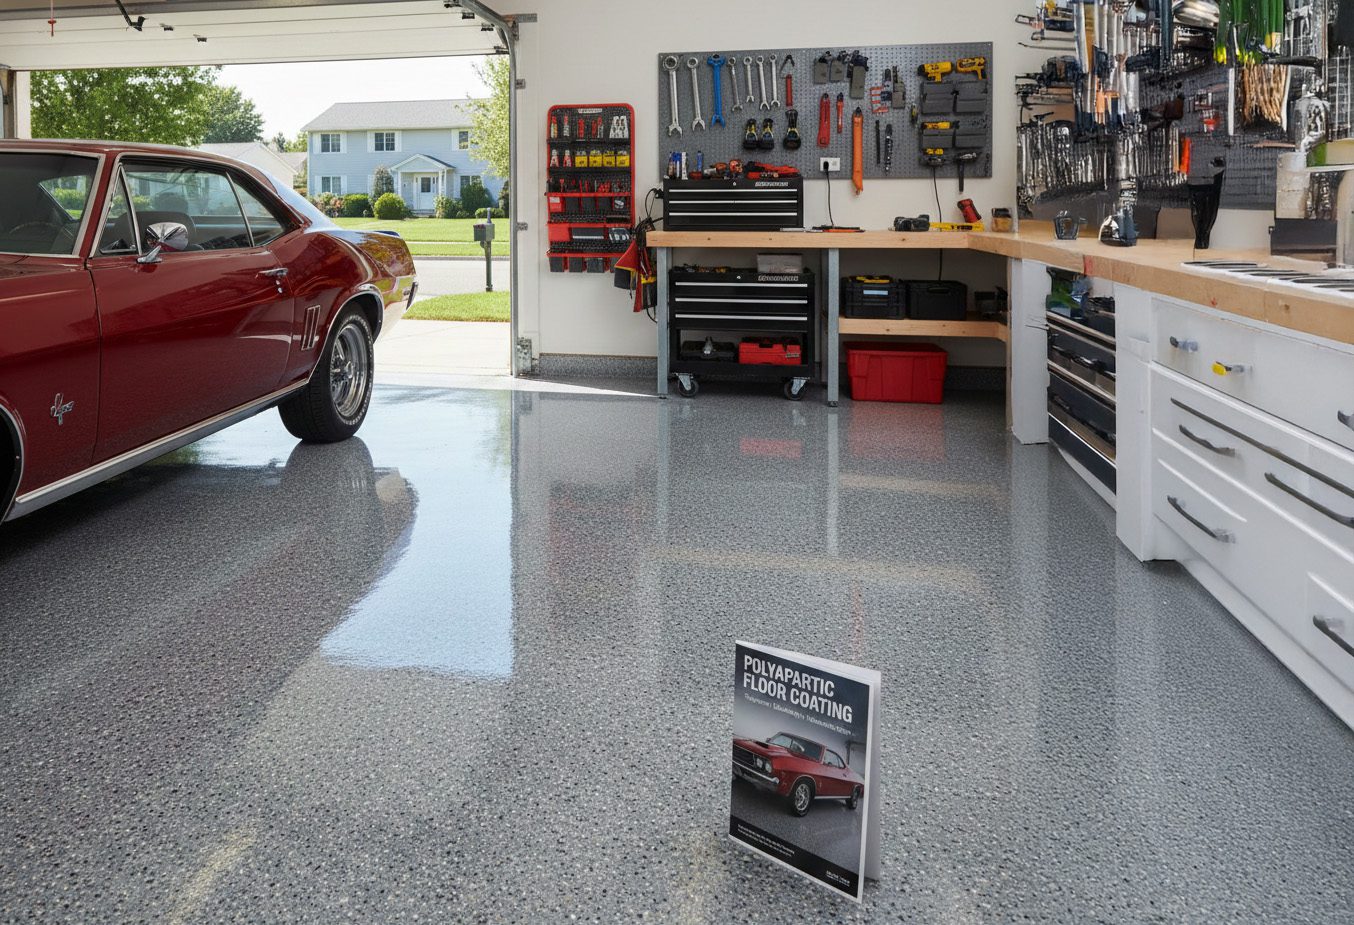
Garage floors take a beating. Between oil drips, tire scuffs, cracking slabs, and moisture pushing up from below, an uncoated concrete floor deteriorates faster than most homeowners expect. Once the surface starts breaking down, loose concrete dusts everything in the space and cleaning becomes a losing battle.
That is where epoxy garage floor paint changes the situation. A properly installed epoxy coating bonds directly to the concrete, sealing the surface against chemicals, moisture, and abrasion. It transforms a worn slab into a clean, durable floor that is far easier to maintain.
At Old Stone Restoration & Installation Corp, we have over 35 years of experience installing epoxy flooring systems for residential, commercial, and industrial properties across Long Island and the greater New York area. Through decades of hands-on work, our team has tested numerous coating systems and understands which products perform best in real-world environments. This guide covers the five best garage floor epoxy paints available in 2026, what separates them, and when a professional installation makes more sense than a store-bought kit.
Why Garage Floors Fail
Concrete is strong under compression but porous. Without a protective coating, several forces attack the surface over time:
Oil and gasoline stains penetrate deep into the concrete, leaving permanent discoloration and weakening the surface layer.
Hot tire marks transfer chemicals from rubber compound onto the floor, leaving sticky residue that lifts paint from poorly bonded coatings.
Hairline cracks develop from freeze-thaw cycles and slab settlement, allowing moisture to enter and widen the damage.
Moisture vapor rising through the slab pushes coatings up from underneath, causing bubbling and delamination that no topcoat can fix without proper prep.
Epoxy coatings address all of these problems when installed correctly. The key word is correct. Surface preparation determines whether an epoxy system lasts 15 years or peels within 18 months.
Quick Comparison Table of the Best Garage Floor Epoxy Paints
Brand
Best For
Durability
DIY Friendly
Professional Grade
Rust-Oleum EpoxyShield
Home Garages
4/5
Yes
No
Rust-Oleum RockSolid Polycuramine
Heavy Use
5/5
Yes
Semi-Pro
ArmorPoxy
Commercial Use
5/5
Moderate
Yes
Epoxy-Coat
DIY Projects
4/5
Yes
No
Colored Epoxies 100% Solids
Professional Installations
5/5
No
Yes
What Makes a Good Garage Floor Epoxy Paint?
Epoxy is a family of thermosetting polymers formed by reacting a resin with a hardening agent. When the two components cure, they cross-link into a tough, chemically resistant film that bonds tightly to concrete. For more on the underlying chemistry, the Wikipedia article on epoxy provides a thorough overview. Not every product marketed as garage floor epoxy performs the same. When evaluating options, these five characteristics matter most.
Chemical Resistance
A quality epoxy coating resists oil, gasoline, and brake fluid without softening or staining. Floors in active garages will contact all three. Products with lower solids content tend to absorb these chemicals over time, leading to discoloration and surface breakdown.
Hot Tire Resistance
Standard latex floor paints fail under hot tires because the rubber compound chemically bonds to the coating as it cools. True epoxy systems cure into a harder film that resists this transfer. Polycuramine and 100% solid epoxy systems offer the strongest performance in this category.
Abrasion Resistance
Daily foot traffic, rolling toolboxes, and vehicle tires all wear the surface. Measured by mil thickness after cure, higher solids content coatings leave a thicker protective film and outlast thin-build products by years.
UV Stability
Garages with windows or open doors expose floors to sunlight. Standard epoxy yellows under UV exposure. Products with added UV stabilizers or urethane topcoats hold their color significantly longer. Beyond color stability, coating formulations are also subject to federal VOC content limits. The EPA’s National Volatile Organic Compound Emission Standards for Architectural Coatings sets maximum VOC limits for products in this category. When comparing epoxy paints, lower VOC formulations are better for indoor air quality and comply with these federal standards.
Ease of Application
Two-part epoxy systems require mixing resin and hardener in the correct ratio and working within an open time that shortens in warm weather. Some DIY kits simplify this process with premeasured components, though they generally trade performance for convenience.
5 Best Epoxy Paints for Garage Floors
1. Rust-Oleum EpoxyShield Garage Floor Coating
Rust-Oleum EpoxyShield is one of the most widely used garage floor coating products in the DIY market. It is a water-based two-part epoxy system designed for residential garages and sold at most home improvement retailers.
Pros:
Widely available and competitively priced
Straightforward two-part mixing process suitable for first-time applicators
Decent resistance to oil stains and mild chemicals
Decorative chip flakes included in many kit versions
Cons:
Water-based formula results in lower solids content than professional systems
Hot tire lifting is a known limitation without a urethane topcoat
Requires very clean, profiled concrete to bond properly
Lifespan of 5 to 10 years under moderate use
Best For: Homeowners with lightly used single-car garages who want a clean appearance on a limited budget.
Expert Rating: 3.5 out of 5. A solid entry-level product for the right application. It will not hold up in a high-use shop environment.
RockSolid uses Polycuramine technology rather than standard epoxy chemistry. Rust-Oleum markets it as 20 times stronger than conventional epoxy, with strong resistance to hot tires, oil, salt, and chemicals. The roll-and-go application process is simpler than traditional two-part epoxy mixing.
Pros:
Superior hot tire resistance compared to standard water-based epoxy
Easier application with the roll-and-go process
Resists salt and road chemicals, particularly useful in northern climates
Attractive semi-gloss finish with good color retention
Cons:
Higher price point than EpoxyShield
Still requires thorough surface etching and cleaning before application
Thinner build than 100% solids professional systems
Best For: Homeowners who want better-than-basic performance without hiring a contractor. Also works well for two-car garages with regular vehicle traffic.
Expert Rating: 4 out of 5. The Polycuramine chemistry offers a real performance upgrade over standard DIY epoxy kits.
3. ArmorPoxy Garage Floor Kit
ArmorPoxy produces a 100% solid epoxy system marketed toward both homeowners and commercial users. The product line includes high-build base coats and multiple topcoat options, giving applicators more control over the final system.
Pros:
High solids content produces a thicker, more durable film
Multiple system configurations available for different environments
Strong chemical and abrasion resistance
Longer expected lifespan than consumer-grade kits, ranging from 10 to 20 years
Cons:
Mixing ratios and application require more experience than basic kits
Higher upfront cost
Surface preparation requirements are stricter than water-based products
Best For: Commercial garages, workshops, and property owners who want a longer-lasting system and are comfortable with a more involved application process.
Expert Rating: 4.5 out of 5. A strong commercial-grade option for those willing to invest in proper prep and application.
4. Epoxy-Coat Professional Floor Coating
Epoxy-Coat offers a 100% solid two-part system with a straightforward ratio and a strong focus on the DIY market. The brand includes detailed instructions and customer support, lowering the learning curve for first-time users tackling a higher-performance product.
Pros:
100% solids formula for better build and durability than water-based alternatives
Clear instructions and available technical support
Wide range of colors and decorative chip options
Good value for the solids content
Cons:
Still requires proper mechanical surface preparation for best adhesion
Open time is shorter in warm weather, requiring efficient application
Not intended for industrial or heavy forklift environments
Best For: Ambitious DIYers who want a professional-quality finish without hiring a contractor. Works well for residential garages and light commercial spaces.
Expert Rating: 4 out of 5. A well-balanced product that bridges the gap between consumer kits and professional systems.
5. Colored Epoxies 100% Solids Epoxy
Colored Epoxies offers one of the highest-performance consumer-accessible 100% solids epoxy systems on the market. With minimal volatile organic compounds, a very high build, and exceptional durability, this product is used by professional epoxy floor contractors and serious DIYers alike.
Pros:
True 100% solids formula with the thickest film build of any product in this comparison
Outstanding chemical, abrasion, and impact resistance
Expected lifespan of 15 to 20 or more years with proper installation
Suitable for industrial and commercial environments beyond the garage
Cons:
Not recommended for inexperienced applicators without professional guidance
Requires diamond grinding or shot blasting for proper adhesion
Higher cost than all other options in this comparison
Best For: Professional installations, commercial properties, and high-use garages where a long-term investment makes sense.
Expert Rating: 5 out of 5. The top-performing product in this comparison. When installed by an experienced epoxy floor contractor, this system delivers the longest service life available.
Which Garage Floor Epoxy Paint Lasts the Longest?
Product
Expected Lifespan
Rust-Oleum EpoxyShield
5 to 10 Years
Rust-Oleum RockSolid Polycuramine
10 to 15 Years
ArmorPoxy
10 to 20 Years
Epoxy-Coat
8 to 15 Years
Colored Epoxies 100% Solids
15 to 20+ Years
Lifespan depends heavily on surface preparation, application quality, and the intensity of use. A professionally installed 100% solids system in a commercial setting will consistently outperform any DIY kit, regardless of brand.
DIY Garage Floor Epoxy vs Professional Installation
DIY Advantages
Lower upfront cost when labor is excluded
Control over scheduling and product selection
Suitable for small, lightly used residential garages
Several quality products available at home improvement retailers
DIY Limitations
Most failed garage floor epoxy jobs trace back to four factors, none of which are related to the paint itself.
Surface preparation: Acid etching, the most common DIY prep method, does not open concrete pores sufficiently for high-performance adhesion. Mechanical grinding is far more effective.
Moisture testing: Applying epoxy over concrete with elevated moisture vapor transmission leads to delamination. Testing requires specialized equipment most homeowners do not own.
Crack repair: Active cracks need to be filled and stabilized before coating. Coating over an active crack without treatment allows the crack to telegraph through the epoxy layer.
Improper curing: Temperature and humidity affect cure time significantly. Many DIY failures occur when coatings are applied outside the manufacturer’s specified conditions.
Why Surface Preparation Matters More Than the Paint
The coating product accounts for less than half of the outcome on any epoxy flooring project. Surface preparation is the determining factor.
Professional installations begin with diamond grinding or shot blasting to mechanically open the concrete profile. This creates the anchor pattern needed for a permanent bond between the epoxy system and the substrate. Acid etching, the standard DIY recommendation, cannot replicate this profile consistently.
Before any coating is applied, moisture vapor transmission testing is performed. Concrete slabs in contact with soil release moisture vapor continuously. If the vapor transmission rate exceeds the coating system’s tolerance, the floor will fail regardless of how good the product is.
Crack repair precedes coating work on any floor with visible damage. Surface cracks must be routed, cleaned, and filled with an appropriate repair compound before the base coat is applied. For a deeper look at this process, see our guide on concrete crack repair.
When Epoxy Paint Is Not Enough
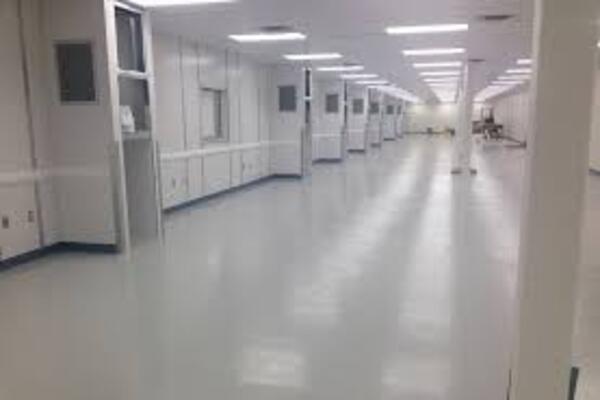
Standard epoxy floor paint is designed for moderate use environments. Certain applications require a more robust solution.
Food processing facilities, manufacturing plants, commercial kitchens, and areas with heavy forklift traffic need a coating system that handles thermal shock, heavy impact, and aggressive chemical exposure. Epoxy paint systems are not rated for these environments.
Epoxy urethane mortar systems fill this gap. These trowel-applied systems are significantly thicker than painted coatings, bond directly to damaged or contaminated concrete, and withstand conditions that would destroy a standard epoxy paint coating within months. They are the preferred solution for industrial floors, loading docks, and any environment where floor failure creates a safety or operational risk.
Old Stone Restoration & Installation Corp installs epoxy urethane mortar systems for commercial and industrial clients throughout Long Island and the New York metro area. These systems are specified when performance requirements exceed what any painted coating can deliver.
Professional Epoxy Flooring Services vs Store-Bought Kits
Store-bought epoxy kits are a reasonable option for residential garages with light to moderate use. A homeowner willing to follow surface preparation steps carefully and work within the manufacturer’s guidelines can achieve a functional result.
Commercial and industrial environments are a different matter. High-traffic floors, chemical exposure, forklift loads, and thermal cycling demand professional-grade epoxy flooring systems installed by experienced contractors. The economics also shift at scale. A professional installation on a commercial floor costs more upfront but requires far fewer repairs and no recoating cycles over the same period that a store-bought kit would need two or three applications.
Residential garage floors that have existing moisture issues, significant cracking, or previous coating failures benefit from professional assessment before any product is applied. Applying a new coating over a floor with unresolved problems produces the same outcome as the previous attempt.
Why Property Owners Choose Old Stone Restoration & Installation Corp
Old Stone Restoration & Installation Corp has provided professional epoxy flooring services across Long Island for over 35 years. The company serves residential, commercial, and industrial clients, with the full range of coating systems needed to match the right solution to each environment.
35 years of industry experience across residential, commercial, and industrial properties
Certified surface preparation specialists using diamond grinding and shot blasting equipment
Moisture vapor testing performed on every project before coating begins
High-performance coating systems including 100% solids epoxy, epoxy urethane mortars, and decorative broadcast systems
Long-term durability focus, with installations specified to minimize lifetime maintenance costs
Every project starts with an honest assessment of the floor’s condition. The recommendation reflects what the floor actually needs, not what is easiest or least expensive to install.
FAQs
What is the best epoxy paint for a garage floor?
For DIY residential applications, Rust-Oleum RockSolid Polycuramine offers the best balance of performance and ease of application. For professional installations, Colored Epoxies 100% Solids or a comparable commercial system delivers the longest service life.
Conclusion
The right garage floor epoxy coating depends on the specific environment and performance requirements.
Category
Recommended Product
Best Overall
Rust-Oleum RockSolid Polycuramine
Best Budget Option
Rust-Oleum EpoxyShield
Best Professional Grade
Colored Epoxies 100% Solids
Best Commercial Option
ArmorPoxy
Best DIY Choice
Epoxy-Coat
For most residential garages, RockSolid Polycuramine offers one of the best combinations of durability and DIY accessibility. For commercial properties, industrial spaces, or any floor with pre-existing problems, a professionally installed 100% solids system is the better long-term investment.
Old Stone Restoration & Installation Corp serves property owners across Long Island and the New York metro area. Whether the project is a residential garage, a commercial showroom, or an industrial facility, the team brings 35 years of experience and the equipment needed to prepare the floor correctly and install a coating system built to last.
Contact us at (631) 821-5619 to request a consultation. For projects requiring industrial-strength floor systems, learn more about our epoxy urethane mortar services below.
FAQs
Is Rust-Oleum epoxy floor paint worth it?
Rust-Oleum products work well for lightly used residential garages when surface preparation is done correctly. EpoxyShield is the more affordable option for basic protection. RockSolid Polycuramine is worth the additional cost for garages with regular vehicle traffic.
How long does garage floor epoxy last?
DIY water-based epoxy systems typically last 5 to 10 years. High-solids professional systems installed with proper surface preparation last 15 to 20 or more years.
Can epoxy be applied over cracked concrete?
Minor surface cracks can be repaired before coating. Active structural cracks need to be evaluated and stabilized first. Applying epoxy over an active crack without treatment will result in the crack reappearing through the coating.
Is professional epoxy flooring better than DIY kits?
For commercial, industrial, and high-use residential floors, professional installation consistently outperforms store-bought kits. The difference comes from mechanical surface preparation, moisture testing, and the use of higher-solids coating systems.
How much does epoxy flooring cost?
DIY kits for a standard two-car garage range from $100 to $500 depending on the product and coverage area. Professional epoxy flooring installation for a residential garage generally ranges from $3 to $12 per square foot depending on the system, surface condition, and prep required.
What is the difference between epoxy and epoxy urethane mortar?
Standard epoxy floor paint is applied by roller and cured into a thin protective film. Epoxy urethane mortar is a trowel-applied system with far greater thickness and compressive strength. Mortar systems are used in industrial and commercial environments where painted coatings cannot meet the performance requirements.
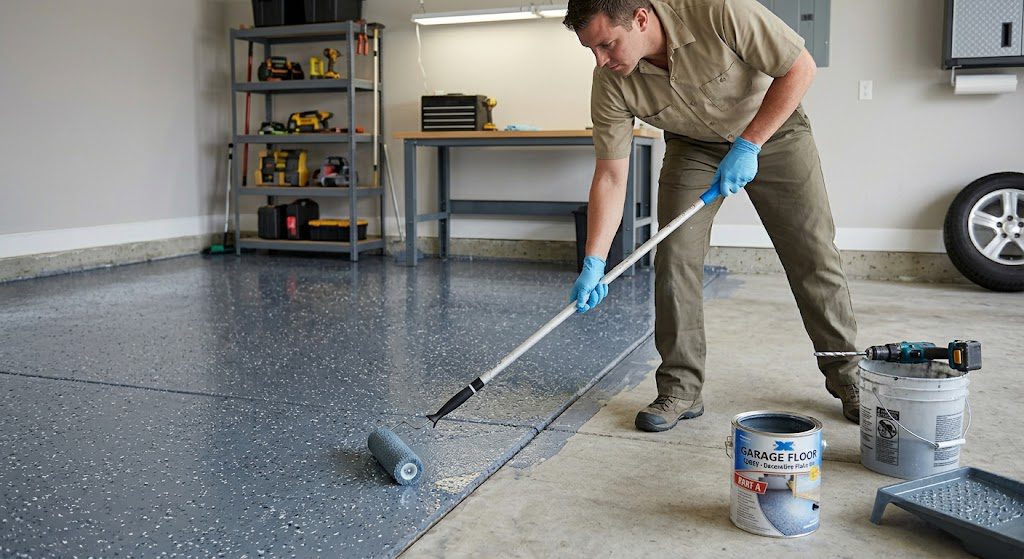
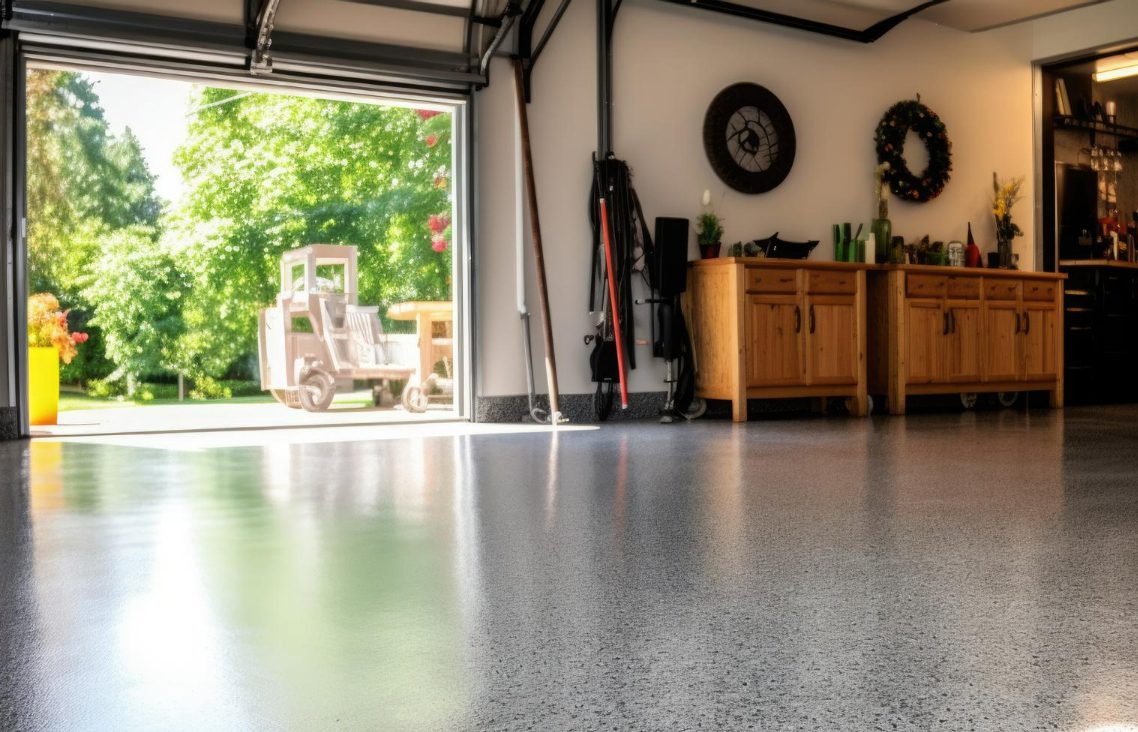
A well-applied epoxy garage floor coating transforms a plain concrete slab into a durable, clean, and chemical-resistant surface built to last for years. Epoxy flooring has become one of the most popular upgrades for homeowners and business owners alike, and for good reason. The finish resists oil, staining, moisture, and heavy foot traffic while making a garage look professionally finished.
That said, installation success depends almost entirely on preparation and technique. Skipping steps or using the wrong materials leads to peeling, bubbling, and early failure.
Old Stone Restoration & Installation Corp. has spent 35 years installing and restoring concrete floors across residential and commercial projects throughout Long Island and the greater New York area. From standard garage floor epoxy paint to heavy-duty epoxy urethane mortar systems for industrial environments, the company brings deep technical knowledge to every project.
What Is Epoxy Garage Floor Paint?
Epoxy garage floor paint is a two-component system made up of a resin and a hardener. When mixed together, a chemical reaction occurs that produces a rigid, plastic-like coating that bonds directly to concrete. This is fundamentally different from latex or oil-based floor paints, which simply dry on the surface without forming a true chemical bond.
How Epoxy Paint Differs from Standard Floor Paint?
Standard floor paint sits on top of the concrete and can be scraped, peeled, or worn through relatively quickly. Epoxy coating penetrates the concrete surface and cures into a hard, cross-linked film. The result is a surface that is significantly harder, more resistant to chemicals, and more durable under vehicle traffic and heavy use.
Benefits of Epoxy Flooring
Chemical resistance: Epoxy coatings stand up to oil, gasoline, antifreeze, and cleaning chemicals without staining or degrading.
Durability: A properly installed garage floor epoxy paint system withstands vehicle traffic, foot traffic, and heavy equipment for a decade or more with basic maintenance.
Easy maintenance: The smooth, sealed surface resists dirt and moisture, making routine cleaning fast and simple.
Improved appearance: Epoxy coatings are available in dozens of colors and can be finished with decorative flakes or metallic effects for a professional, polished look.
Increased property value: A clean, finished garage floor adds visual appeal and perceived value to residential and commercial properties alike.
Is Epoxy Paint the Right Choice for Your Garage Floor?
Epoxy is an excellent choice for most residential garages and many light commercial applications. However, it is not the right system for every situation.
Ideal conditions for epoxy flooring include concrete that is structurally sound, free from major cracking, and has low to moderate moisture levels. The floor should be relatively flat and free from oil contamination that has penetrated deep into the slab.
Epoxy may not be the best fit in the following situations:
Heavy industrial environments with constant forklift traffic or extreme chemical exposure
Concrete with ongoing moisture vapor transmission from below
Floors with severe impact conditions or heavy mechanical loading
When to Consider Epoxy Urethane Mortars?
For floors that have sustained significant damage, spalling, or deep surface irregularities, standard epoxy paint alone will not hold up. Epoxy urethane mortar systems are heavy-duty flooring solutions designed to repair and resurface damaged concrete while delivering exceptional impact resistance, chemical protection, and long-term performance. These systems are thicker and more structurally robust than standard coatings, making them the right choice for commercial kitchens, warehouses, manufacturing floors, and other demanding environments.
Old Stone Restoration & Installation Corp installs industrial-grade epoxy urethane mortar systems for clients across a range of industries where floor performance cannot be compromised.
Tools and Materials Needed
Essential Tools
Floor grinder or diamond grinder (for surface preparation)
Pressure washer
Concrete degreaser and cleaner
Crack filler or concrete patching compound
Drill with mixing paddle
Squeegee
Paint roller with extension pole
Paint tray and brushes for edge work
Safety Equipment
Chemical-resistant gloves
Respirator rated for chemical vapors
Safety glasses or goggles
Slip-resistant footwear
How to Prepare a Garage Floor Before Applying Epoxy Paint?
Surface preparation is the single most important factor in a successful epoxy garage floor installation. A floor that is not properly prepared will cause the coating to peel, bubble, or fail within months, regardless of product quality.
Remove Everything from the Garage
Clear the entire space before starting. This includes vehicles, shelving units, storage boxes, and any mounted equipment near the floor. The entire slab needs to be accessible.
Clean Oil, Grease, and Dirt
Use a dedicated concrete degreaser to break down oil and grease stains. Apply the cleaner, scrub with a stiff-bristle brush, and rinse thoroughly with a pressure washer. Any oil contamination left on the surface will prevent the epoxy from bonding properly.
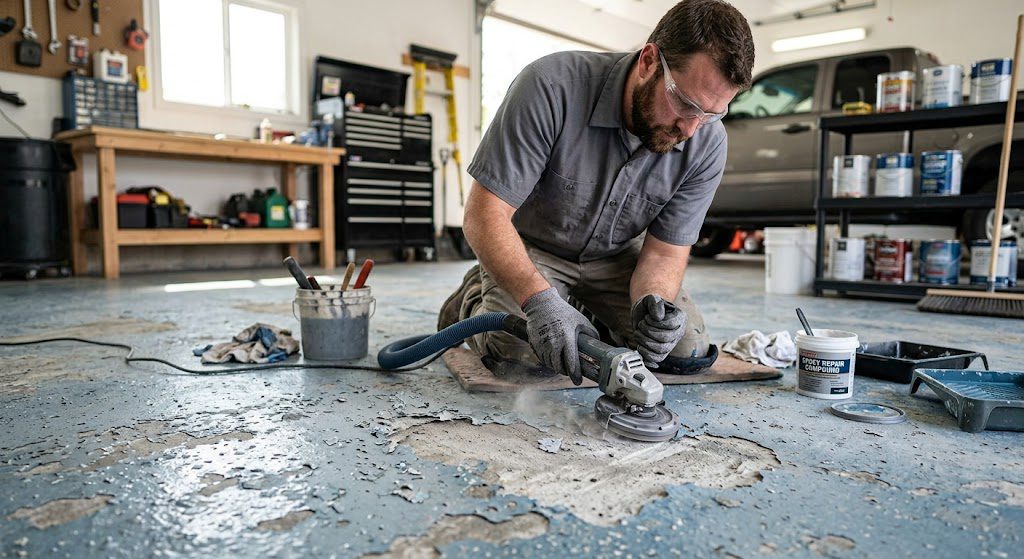
Repair Cracks and Surface Damage
Fill cracks wider than a hairline with a polyurethane or epoxy-based crack filler. Allow the material to cure fully according to the product instructions before proceeding. For floors with significant spalling or deep damage, a resurfacing product or mortar system may be required before the epoxy coat is applied.
Test for Moisture Problems
Tape a 16-by-16-inch sheet of plastic to the floor and seal all four edges with tape. Leave it in place for 24 hours. If moisture collects beneath the plastic, the slab has a moisture problem that must be addressed before epoxy application. Installing epoxy over a damp slab is one of the most common causes of coating failure.
Grind or Etch the Concrete Surface
The concrete surface must be opened up so the epoxy can penetrate and bond. A floor grinder with a diamond disc produces the most consistent results and is the preferred method for professional installers. Acid etching is an alternative method sometimes used for DIY applications, though grinding produces a more reliable surface profile.
Vacuum and Final Cleaning
After grinding or etching, vacuum the entire floor thoroughly to remove all concrete dust and debris. Follow up with a damp mop and allow the floor to dry completely before applying any product.
How to Apply Epoxy Paint to a Garage Floor?
Step 1: Read Product Instructions Carefully
Every epoxy product has specific mixing ratios, pot life, temperature requirements, and recoat windows. Read the full instructions before opening any containers. Deviating from manufacturer guidelines is a direct path to application failure.
Step 2: Mix the Epoxy Components Properly
Combine Part A (resin) and Part B (hardener) in the exact ratio specified on the product label. Use a mixing paddle attached to a drill and mix thoroughly for the full recommended time, typically two to three minutes. Incomplete mixing results in soft spots and uneven curing.
Step 3: Apply the Primer Coat
A primer coat seals the concrete and improves adhesion for the epoxy layers that follow. Many epoxy systems use a diluted version of the base coat as a primer. Apply it with a roller, working it into the surface. Why primer matters: without a primer coat, the topcoat can delaminate or show uneven gloss levels, particularly on porous concrete.
Step 4: Cut In Around Edges
Use a brush to apply epoxy along the perimeter of the garage, around floor drains, and near any transitions. Cutting in first allows the roller to move quickly through the open floor area without stopping at edges.
Step 5: Apply the First Epoxy Coat
Pour the mixed epoxy into a paint tray and apply with a 3/8-inch nap roller. Work in sections, starting from the farthest corner and moving toward the garage door exit so the floor is never stepped on after coating. Maintain a wet edge throughout to avoid lap marks.
Step 6: Add Decorative Color Flakes (Optional)
If using vinyl color flakes, broadcast them into the wet first coat immediately after rolling. Toss the flakes lightly from knee height to achieve even distribution. A full broadcast creates a heavily textured surface; a partial broadcast gives a more subtle decorative effect.
Step 7: Apply the Second Coat
Once the first coat has reached the recoat window specified by the manufacturer, apply a second full coat using the same technique. The second coat builds film thickness and eliminates any thin spots left by the first pass.
Step 8: Add a Protective Topcoat
A topcoat seals the surface and adds UV resistance, abrasion resistance, and a finished sheen. Polyaspartic topcoats cure faster and offer excellent UV stability, making them a strong choice for garages with sunlight exposure. Urethane topcoats provide outstanding chemical and abrasion resistance and are commonly used in commercial settings. Both should be applied in thin, even passes to avoid runs or sags.
Common Mistakes That Cause Epoxy Floors to Fail
Applying epoxy over damp or moisture-compromised concrete
Skipping or rushing surface preparation, including degreasing and grinding
Incorrect mixing ratios between resin and hardener
Applying epoxy in temperatures below 50 degrees Fahrenheit or above 90 degrees Fahrenheit
Not allowing adequate cure time between coats or before vehicle traffic
Using consumer-grade or low-quality epoxy products that lack the film thickness and chemical resistance of professional-grade systems
DIY vs Hiring an Epoxy Floor Contractor
DIY epoxy garage floor kits are widely available at home improvement stores and can be a reasonable option for small garages with sound, clean concrete and owners comfortable with detailed preparation work. The upfront cost is lower, but the risk of failure is higher without professional equipment and experience.
Professional epoxy flooring installation offers a higher-quality finish, faster completion, and significantly better long-term durability. Professional contractors have access to commercial-grade products that are not sold at retail, and they bring the surface preparation equipment needed to do the job right the first time.
When does DIY make sense?
Small single-car garage with clean, sound concrete
Low budget with tolerance for a shorter product lifespan
Owner has prior experience with surface prep and coatings
When is professional installation worth it?
Larger garages or commercial floors where failure means a costly redo
Concrete with existing damage, cracks, or moisture issues
Projects requiring industrial-grade coatings or decorative finishes
Any situation where the floor needs to perform under heavy traffic or chemical exposure
Old Stone Restoration & Installation Corp has delivered professional epoxy flooring service across residential and commercial projects for over 35 years. The team handles surface preparation, coating selection, and application with the skill and equipment that separates a floor that lasts from one that fails. For demanding environments, the company also installs industrial-grade systems including epoxy urethane mortars built to handle real-world punishment.
How Long Does Epoxy Garage Flooring Last?
A professionally installed epoxy garage floor typically lasts between 10 and 20 years with proper maintenance. DIY applications using consumer-grade products may last 3 to 5 years before requiring recoating.
Factors that affect lifespan include:
Traffic levels: Floors under daily vehicle traffic wear faster than those in lightly used garages
Preparation quality: Floors with thorough surface prep last significantly longer
Maintenance habits: Prompt cleanup of chemical spills and regular cleaning extend the coating life
Product quality: Commercial-grade epoxy systems outperform retail kits in film thickness and chemical resistance
Garage Floor Maintenance Tips
Weekly cleaning: Sweep or dust mop the floor weekly to prevent grit and debris from grinding into the surface. A pH-neutral cleaner and a mop work well for routine wet cleaning.
Removing chemical spills: Clean up oil, gasoline, and chemical spills as soon as they occur. Most spills wipe up easily from a cured epoxy surface with a paper towel and a mild cleaner. Prolonged contact can cause staining or surface softening depending on the product.
Protecting against tire marks: Hot tire pick-up is a common issue with standard epoxy. Using a polyaspartic or urethane topcoat greatly reduces tire marking. Parking mats placed under tires also provide protection during hot weather.
When to recoat: Watch for areas where the finish has worn thin, especially near the garage door and in vehicle wheel paths. Spot recoating or a full recoat before the coating wears through to bare concrete extends the overall floor life considerably.
Epoxy Flooring Cost for Garage Floors
DIY cost breakdown: A standard two-car garage epoxy kit from a home improvement store typically runs between $100 and $300 for basic products. Add equipment rentals, concrete cleaner, crack filler, and topcoat products, and the total project cost usually falls between $300 and $600.
Professional installation cost factors: Professional epoxy flooring for a residential garage generally ranges from $3 to $12 per square foot depending on the coating system, surface condition, and decorative options selected.
What impacts pricing:
Garage size: Larger floors reduce cost per square foot due to economies of scale
Surface repairs: Significant crack repair, spalling repair, or moisture mitigation adds to the project cost
Coating system: Basic solid-color systems cost less than multi-layer systems with decorative flakes and urethane topcoats
Decorative finishes: Metallic, quartz broadcast, and custom color systems carry a premium over standard solid-color coatings
Signs the Floor Needs More Than Epoxy Paint
Standard epoxy paint is not a repair product. Applying it over structural problems will not fix them and will likely accelerate coating failure. Watch for these warning signs:
Large cracks running across the slab that indicate movement or foundation settlement
Surface spalling, where chunks of concrete are breaking away from the surface
Uneven concrete with height differences of more than 1/4 inch across the floor
Industrial wear patterns where forklift or heavy equipment traffic has ground down the concrete
In these cases, epoxy urethane mortar systems are the appropriate solution. These heavy-duty systems build up damaged concrete, level uneven surfaces, and deliver a finished floor that stands up to the kind of punishment standard epoxy coatings cannot handle.
Why Choose Old Stone Restoration & Installation Corp for Epoxy Flooring?
Old Stone Restoration & Installation Corp brings 35 years of hands-on experience in concrete floor installation, restoration, and coating systems to every project. That depth of experience translates into correct product selection, proper surface preparation, and finished floors that hold up over time.
Residential and commercial expertise across a wide range of project types and environments
Access to industrial-grade epoxy and urethane mortar systems not available through retail channels
Comprehensive surface preparation including diamond grinding, moisture testing, and crack repair
Customized flooring solutions matched to the specific demands of each client’s space
A long-term performance focus that prioritizes durability over quick, inexpensive shortcuts
Conclusion
A successful epoxy garage floor installation comes down to preparation, correct product selection, and careful application technique. Every step matters, from grinding the concrete to mixing the epoxy components properly to allowing full cure before putting the floor back into service.
For homeowners and business owners who want a floor that genuinely holds up over time, professional installation is the more reliable path. Consumer-grade kits can work for small, straightforward projects, but they carry real risk of failure when preparation is rushed or conditions are not ideal.
Old Stone Restoration & Installation Corp. has installed and restored concrete floors for over 35 years, bringing the same standard of preparation and product quality to every project regardless of size. Whether the project calls for a standard residential garage floor coating or an industrial-grade epoxy urethane mortar system built to withstand the toughest conditions, the team delivers floors that perform and last.
Contact Old Stone Restoration & Installation Corp. today to discuss the right epoxy flooring system for the project. Call (631) 821-5619 to request a consultation.
FAQs
Can Epoxy Paint Be Applied Over Old Garage Paint?
Applying epoxy over old paint is not recommended unless the existing paint is fully adhered, free from peeling, and compatible with epoxy. In most cases, the old paint should be removed by grinding to ensure a proper bond.
How Long Before Walking on Epoxy Flooring?
Most epoxy systems allow light foot traffic after 24 hours. Follow the specific product instructions, as working time and cure time vary by product and temperature.
How Long Before Parking a Vehicle?
Vehicle traffic should typically be avoided for at least 72 hours after the final coat. Full chemical cure, which determines maximum hardness and resistance, often takes 7 days.
Does Epoxy Flooring Crack?
Epoxy coatings do not crack under normal conditions. If the concrete beneath shifts or cracks, the epoxy coating may reflect that movement. Proper surface preparation and using a flexible primer can reduce this risk.
Is Epoxy Flooring Slippery?
A smooth epoxy finish can be slippery when wet. Adding non-slip aggregate to the topcoat, or choosing a quartz or chip broadcast system, significantly improves traction.
How Many Coats of Epoxy Are Needed?
Most residential applications use a primer coat, one or two base coats, and a protective topcoat. The total number of coats depends on the product system and the desired durability level.
Can Epoxy Be Applied in Cold Weather?
Epoxy should not be applied when the concrete temperature is below 50 degrees Fahrenheit. Cold temperatures slow curing and can result in a soft, under-cured finish. Most manufacturers specify both an ambient air temperature and a concrete surface temperature minimum.
What Is the Difference Between Epoxy Paint and Epoxy Coating?
Epoxy paint typically refers to a one-component product with a relatively low epoxy content, sold at retail for basic applications. A true epoxy coating is a two-component system with a higher solids content and a genuine chemical cure, providing far superior performance and longevity.
How Do I Know If My Concrete Is Ready for Epoxy?
Concrete is ready for epoxy when it is clean, dry, structurally sound, and has an open surface profile from grinding or etching. A moisture test should be performed before any coating is applied.
Should I Hire an Epoxy Floor Contractor?
For any garage larger than a single-car space, any floor with existing damage, or any project requiring a long-lasting finish, hiring a professional epoxy floor contractor is the most cost-effective decision over time. The quality difference between professional and DIY results is significant, particularly in adhesion, film build, and long-term durability.
An epoxy floor was installed by you. First impressions were good. Then, a few months later, you noticed something wrong. A corner is starting to lift. A bubble forming near the garage door. Flakes breaking off where your car sits every night. What started as a clean, polished surface now looks worse than the bare concrete underneath.
Most people do not realize: peeling epoxy is just a surface problem. It almost always points to something that went wrong deeper down, whether that is moisture pushing up through the slab, a preparation step that was skipped, or a coating product that simply was not built for the conditions it faced.
At Old Stone Restoration and Installation Corp, our team has spent 35 years diagnosing and repairing concrete and resin flooring systems across Long Island and beyond. This blog walks you through everything: what peeling looks like, why it happens, and how to fix it properly the first time.
What Does Epoxy Floor Peeling Look Like?
Epoxy failure does not happen in one night. Usually, it starts small and spreads if nothing is done about it. Knowing what to look for early can save you from a full floor replacement down the line.
The common signs of epoxy floor peeling include:
Flaking: Small chips or thin sheets of coating breaking away from the surface, often near high traffic areas
Bubbling: Dome shaped raised areas where the coating has lifted off the concrete but not yet broken apart
Edge lifting: The coating peeling back along walls, doorways, or transitions, usually the first sign of adhesion failure
Sheet delamination: Large sections of coating coming away in one piece, which typically signals a serious moisture or prep issue
If you are seeing more than one of these at once, the floor is telling you something important. The sooner you address it, the less work the repair will involve.
Why Is Your Epoxy Floor Peeling?
This is where most generic advice falls short. People are told to “just recoat it” without anyone explaining why the first coat failed. Applying new epoxy over a failed surface without fixing the root cause almost guarantees the same result within months. Here are the real reasons epoxy floors peel.
1. Poor Surface Preparation
This is the single most common cause of epoxy failure, and it accounts for the majority of coating problems we see. Epoxy needs a clean, open, properly profiled surface to bond with. When the slab is only acid etched or left dusty after grinding, the epoxy sits on top rather than bonding into the concrete. At first, it looks fine, but under traffic and temperature changes, it separates.
2. Moisture Vapor Coming Through the Concrete
Concrete is porous. Water in the ground below can travel up through the slab as vapor, especially in basements and ground floor slabs. When that vapor has nowhere to go because a coating is sealing the surface, it builds pressure underneath the epoxy and pushes the coating up. This is called hydrostatic pressure, and it is responsible for a large portion of bubbling and full sheet delamination cases.
3. Oil, Grease, and Surface Contamination
In garages and workshops, oil and grease soak into concrete over years of use. Even after cleaning, residue can remain deep in the surface. Epoxy cannot bond through contamination. If the floor was not degreased and mechanically cleaned before coating, those contaminated spots become weak points where peeling begins.
4. Hot Tire Pickup in Garage Floors
This is a problem unique to residential and light commercial garages. When a vehicle has been driven and its tires are hot, parking it on an epoxy floor transfers significant heat to the coating. Standard epoxy softens under that heat, and when the car is moved, the tires pull the coating with them. Over time, this creates the striped peeling pattern you often see in garage installations.
5. Low Quality DIY Epoxy Kits
The kits sold at big box stores are typically water based, thinner, and formulated for general use. They do not have the bonding strength, film build, or chemical resistance of professional grade systems. They also come with minimal surface prep guidance, which means most people skip steps they do not know matter. The result looks acceptable for a season, then starts breaking down.
6. Incorrect Mixing Ratio or Cure Time
Epoxy is a two part system. The resin and hardener need to be combined in an exact ratio and mixed thoroughly. If the ratio is off even slightly, or if the mixed product is applied before or after its working window, the chemistry does not complete properly. The result is a coating that never fully cures, stays soft, and peels under load.
How to Diagnose the Real Cause Before Repairing?
Before you spend a dollar on materials or labor, match what you are seeing to the likely cause. This table gives you a starting framework.
Symptom
Likely Cause
Repair Type
Urgency
Peeling near tire marks
Hot tire pickup
Spot repair or full recoat
Medium
Bubbling across large areas
Moisture vapor / hydrostatic pressure
Full system removal
High
Lifting along edges or seams
Poor surface prep
Diamond recoat
Medium
Random scattered flakes
Surface contamination
Surface remediation + recoat
Low to Medium
Widespread sheet delamination
Multiple failures combined
Full replacement
High
If your situation involves multiple symptoms at once, the repair scope will likely be larger. A professional assessment will give you a clearer picture before work begins.
How to Fix Epoxy Floor Peeling (Step by Step)
The right repair process depends on the extent and cause of the failure. Here is what a proper remediation looks like from start to finish.
Step 1: Test the Extent of Failure
Walk the floor and tap it with a coin or hammer. A hollow sound indicates delamination beneath the surface even where the floor looks intact. Mark all affected areas. This helps you determine whether spot repair is viable or whether full removal is the more practical path.
Step 2: Remove All Loose Coating
Any coating that has separated or is close to separating needs to come off completely. This involves using floor grinders, hand scrapers for detailed areas, and in more severe cases, shot blasting equipment that removes coating uniformly across the slab. Leaving compromised material in place and coating over it is one of the most common mistakes made during DIY repairs.
Step 3: Repair Surface Damage
Once the loose coating is removed, inspect the concrete for cracks, pits, and spalling. These need to be filled with a compatible concrete repair mortar and allowed to cure fully before any new coating is applied. Skipping this step means visible defects will telegraph through the new surface.
Step 4: Diamond Grind the Slab
The entire repair area, and ideally the full floor, needs to be mechanically ground using a diamond grinder. This opens the pores of the concrete, removes any remaining contamination, and creates the surface profile that epoxy needs to bond properly. Grinding is not optional for a repair that is meant to last.
Step 5: Conduct Moisture Testing
Before any coating goes down, test the slab for moisture vapor transmission. A calcium chloride test or an in situ relative humidity probe will tell you whether moisture is a factor. If it is, a moisture mitigating primer or barrier coat needs to be applied first. Skipping this step after a moisture related failure means the same thing will happen again.
Step 6: Apply New Primer and Coating System
Once the surface is clean, dry, and properly profiled, the new system can go down. This typically involves a penetrating epoxy primer, one or more build coats, and a durable topcoat. Product selection should be based on the specific use case: a garage floor has different demands than a commercial kitchen or an industrial warehouse.
According to ICRI guidelines, concrete surfaces must be mechanically prepared to achieve the proper surface profile before epoxy installation.
When Spot Repairs Work vs. When You Need Full Replacement?
This is one of the most common questions we get, and the honest answer depends on the percentage of the floor affected and the root cause.
Spot repair is a reasonable option when less than 20 percent of the floor is affected, the cause is localized such as a single contamination area or isolated hot tire damage, and the surrounding coating is still firmly bonded to the slab.
Full system replacement becomes the recommended path when 25 to 30 percent or more of the floor has delaminated, the cause is moisture vapor, or the existing coating is more than 10 years old and showing general wear alongside localized failure.
Choosing spot repair when full replacement is warranted is a short term fix. The surrounding coating will continue to fail, and you will be back to the same situation within a year or two.
Why Garage Epoxy Floors Peel More Often?
Garages are genuinely harder environments for epoxy than most people expect. A residential garage floor deals with conditions that would challenge even well applied coatings over time.
Vehicle heat: Engines and tires transfer heat to the floor repeatedly, stressing the coating bond over time
Road salt tracking: In colder months, salt carried in on tires is chemically aggressive and can degrade certain coating systems from the surface down
Rainwater and humidity: Wet vehicles dripping onto the floor introduce moisture, and if the slab has any vapor transmission issues, this compounds the problem
Freeze and thaw cycles: In climates like Long Island, the ground contracts and expands seasonally, and concrete slabs move with it. Coatings that are not flexible enough crack and lift along with that movement
These factors combined mean that garage epoxy floor restoration needs to be chosen carefully and installed correctly from the beginning. A standard DIY kit is rarely adequate for a working garage.
The American Society of Concrete Contractors notes that improper surface preparation and moisture vapor transmission are among the leading causes of coating failure in concrete flooring systems.
Best Long Term Solution for Severely Damaged Floors
When a floor has failed repeatedly, or when the environment is particularly demanding, standard epoxy may not be the right product for the job. This is where higher performance systems come into play.
For example, Urethane mortar systems are significantly thicker than standard coatings and are designed for environments with moisture, thermal shock, and heavy loads. They bond to concrete even in higher moisture conditions and are widely used in commercial kitchens, food processing facilities, warehouses, and industrial epoxy repairs where standard epoxy systems fail.
At Old Stone Restoration and Installation Corp, we install epoxy and urethane mortar flooring systems built for spaces that demand more than a basic coating can offer.
For homeowners with recurring garage floor issues, a professional grade epoxy system with a proper moisture barrier and a polyurea or polyaspartic topcoat will dramatically outlast anything available at a hardware store.
How to Prevent Epoxy Floor Peeling in the Future?
Getting the installation right from the beginning is far less expensive than repairing a failure. Here is what proper prevention looks like:
Always conduct moisture testing before any coating is applied
Use mechanical grinding or shot blasting, not acid etching alone, to prepare the surface
Select a primer that is compatible with your slab conditions and the topcoat product
Allow full cure time before opening the floor to traffic, even if the surface feels dry
Use traffic protection (plywood or mats) during the first week after installation in heavy use areas
Choose a topcoat rated for hot tire resistance in garage applications
Have the installation done by a contractor who offers a written process, not just a price
DIY vs. Professional Epoxy Floor Repair
DIY Epoxy Repair
Professional Epoxy Repair
Lower upfront cost
Longer lifespan with proper installation
Risk of repeating the same failure
Root cause diagnosed before any work begins
Limited to basic tools and kits
Industrial equipment including shot blasters and grinders
No moisture testing capability
Moisture vapor testing done before coating
Often voids manufacturer warranties
Work backed by experience and guarantees
Temporary fix in most failure cases
Permanent solution suited to the actual problem
The upfront cost difference between DIY and professional repair is often less than people expect, especially when you factor in the cost of a second failure and having to redo the work entirely.
Why Property Owners Trust Old Stone Restoration and Installation Corp?
Choosing the right contractor for epoxy floor repair is not just about finding someone with the equipment. It is about working with people who understand why floors fail and how to make sure the repair actually holds.
Old Stone Restoration and Installation Corp has been serving residential, commercial, and industrial clients across Long Island for over 35 years. Our work covers everything from single car garages to large scale commercial facilities, and our process is built around diagnosing the real problem before recommending any solution.
We offer epoxy flooring service for surface diagnostics that identify moisture, contamination, and prep failures before any work begins. Our team uses professional grade equipment including diamond grinders and shot blasters for proper surface preparation. Among the coating systems we install are epoxy, moisture-mitigating primers, decorative flake and metallic systems, quartz broadcast flooring, and high-performance urethane mortars.
Every project starts with an honest assessment. If a spot repair will hold, we will tell you. If the floor needs full replacement, we will explain why before you commit to anything.
FAQs
Can peeling epoxy floors be repaired?
Yes, in many cases they can. Spot repairs or system replacements may be appropriate depending on the extent of damage and what caused it. Floors with less than 20 percent of the coating has delaminated are often good candidates for targeted repair. Larger failures or those caused by moisture require full removal and reinstallation.
Why is my epoxy garage floor peeling under my tires?
This is almost always hot tire pickup. When car tires are warm from driving, they transfer heat to the epoxy surface. Standard epoxy softens under that heat, and the tire pulls the coating away when the car is moved. The fix involves removing the failed coating, preparing the slab properly, and applying a topcoat designed to resist thermal stress.
Can you epoxy over peeling epoxy?
No. Applying new epoxy over a surface that is already delaminating will not solve the problem and it will peel again. All loose and compromised material must be fully removed and the slab properly prepared before any new coating can be applied.
How long should epoxy flooring last?
A professionally installed epoxy system in a residential garage or basement should last 10 to 20 years with proper maintenance. In commercial or industrial environments with heavier traffic, a high performance system can last a similar duration when the right product is selected for the conditions.
Does moisture cause epoxy floor failure?
Yes, moisture is one of the leading causes of epoxy failure. When water vapor moves up through a concrete slab and cannot escape because the surface is sealed, it creates pressure beneath the coating that causes bubbling and delamination.
When you plan to install industrial epoxy flooring, choosing the right contractor is one of the most important steps. A good contractor can make your floor strong, smooth, and long-lasting. A poor choice can lead to cracks, peeling, and wasted money.
If you are not sure how to choose the right industrial epoxy flooring contractor, don’t worry. This guide will help you understand everything in a simple way.
What Is Industrial Epoxy Flooring and Why Does It Matter?
Industrial epoxy flooring is a special coating applied on concrete floors. It makes the surface strong, shiny, and resistant to damage.
This type of flooring is commonly used in:
Warehouses
Factories
Hospitals
Parking areas
It protects the floor from heavy machines, chemicals, and daily wear and tear.
That’s why choosing the right contractor is very important. The quality of work directly affects how long your floor will last.
How to Choose the Best Industrial Epoxy Flooring Contractor
1. Check Their Experience in Industrial Projects
Not all contractors are the same. Some may only work on small residential projects. But industrial flooring needs special skills.
Always choose a contractor who has experience with:
Large commercial or industrial spaces
Heavy-duty flooring systems
Different epoxy coatings
An experienced contractor knows how to handle problems and deliver better results.
2. Ask About Their Past Work
Before hiring, ask for examples of their previous projects.
You can request:
Photos of completed floors
Case studies
Client references
This helps you understand the quality of their work.
If possible, visit a site where they have worked. Seeing real results gives you confidence.
3. Understand the Materials They Use
Good contractors always use high-quality epoxy materials.
Low-quality products can:
Crack easily
Lose shine
Wear out quickly
Ask questions like:
What type of epoxy do you use?
Is it suitable for heavy industrial use?
A reliable contractor will clearly explain everything.
4. Check Surface Preparation Process
Many people ignore this step, but it is very important.
Before applying epoxy, the concrete surface must be:
Clean
Dry
Properly prepared
If this step is done poorly, the epoxy coating may fail.
A good contractor will:
Grind the surface
Repair cracks
Remove dust and oil
Proper preparation ensures long-lasting results.
5. Look for Proper Licensing and Insurance
Always make sure the contractor is licensed and insured.
This protects you from:
Legal issues
Damage during work
Worker accidents
A professional contractor will have all necessary documents.
6. Compare Pricing, But Don’t Choose the Cheapest
It is tempting to choose the lowest price, but that can be risky.
Cheap services may mean:
Poor materials
Lack of experience
Short-term results
Instead, compare:
Quality of work
Materials used
Warranty offered
Choose value, not just price.
7. Ask About Warranty and After-Service
A good contractor stands behind their work.
Ask if they provide:
Warranty on epoxy flooring
Maintenance support
This shows they are confident in their service.
8. Check Reviews and Reputation
Online reviews can tell you a lot about a contractor.
Look for:
Google reviews
Website testimonials
Client feedback
Consistent positive reviews mean the contractor is reliable.
Common Mistakes to Avoid When Hiring a Contractor
Many people make simple mistakes while choosing a contractor.
Avoid these:
Hiring without checking experience
Ignoring surface preparation
Choosing only based on price
Not asking about materials
These mistakes can cost you more in the long run.
Benefits of Hiring the Right Contractor
When you choose the right industrial epoxy flooring contractor, you get:
Strong and durable flooring
Smooth and attractive finish
Long-lasting performance
Better safety for workers
It saves money and stress in the future.
Why Experience Matters in Industrial Epoxy Flooring
Industrial environments are tough. Floors face heavy loads, chemicals, and constant use.
Only an experienced contractor can:
Select the right epoxy system
Apply it correctly
Ensure long-term durability
This is why experience should always be your top priority.
Why Choose Old Stone Restoration & Installation Corp
If you are looking for a trusted industrial epoxy flooring contractor, our team is ready to help. We use proven methods, quality materials, and careful preparation to deliver the best results.
We focus on quality work, honest service, and long-term results.
FAQs
How do I know if an epoxy contractor is good?
A good contractor has experience, positive reviews, proper licensing, and shows past work. They also explain their process clearly.
How long does industrial epoxy flooring last?
With proper installation and maintenance, it can last 10–20 years or even longer.
Is epoxy flooring good for heavy industries?
Yes, industrial epoxy flooring is designed to handle heavy machines, chemicals, and high traffic.
How long does installation take?
It usually takes 2 to 5 days, depending on the size and condition of the floor.
What is the cost of industrial epoxy flooring?
The cost depends on:
Floor size
Condition of concrete
Type of epoxy used
It is best to get a detailed quote from a contractor.
A garage floor coating may look strong on day one, but not every system lasts the same. Some floors begin peeling, staining, or wearing down within a few years, while others hold up for decades. That is why many property owners wonder how long does epoxy garage floor last before investing in a new coating.
In most cases, epoxy flooring in a garage lasts about 10 to 20 years, and in some cases even longer with professional installation and the right system. Poor surface preparation, low-quality materials, and DIY applications usually shorten that lifespan. On the other hand, floors installed by experienced epoxy floor contractors often perform much better over time. Companies like Old Stone Restoration & Installation Corp. help property owners choose flooring built for long-term durability, appearance, and daily use.
What is the Average Lifespan of Epoxy Garage Floors?
The lifespan of an epoxy garage floor depends heavily on the system used and how it is installed.
DIY Epoxy Floors
Most DIY garage floor kits last about 2 to 5 years. Some begin showing wear much earlier, especially in garages with daily vehicle traffic, moisture issues, or poor slab preparation. Common problems include peeling, bubbling, chipping, and weak adhesion. In many cases, the main issue is not the epoxy itself, but the lack of mechanical grinding and the use of thinner, lower-grade materials.
Professional Epoxy Flooring
A professionally installed garage floor usually lasts 10 to 25 years. This is where the real value of professional epoxy flooring vs DIY becomes clear. Professional systems are often thicker, better bonded, and designed for long-term traffic, chemical exposure, and abrasion resistance. Skilled epoxy floor contractors also know how to identify slab problems before coating begins.
High-Performance Systems
High-performance systems can last 20 to 30+ years, especially when built with industrial-grade materials, stronger resin systems, and protective topcoats. These floors are often used in demanding environments where standard coatings may not be enough. When the floor is installed correctly and maintained well, garage floor coating durability can exceed expectations by a wide margin.
What Affects How Long Epoxy Flooring Lasts?
Several factors determine the true epoxy garage floor lifespan.
1. Surface Preparation
Surface preparation is often the number one reason for success or failure. Mechanical grinding creates the proper profile so the coating bonds tightly to the concrete. Acid etching alone is often inconsistent and may not create the same level of adhesion. Poor prep leads to early peeling and delamination.
2. Quality of Materials
Not all epoxy is the same. Water-based systems are usually thinner and less durable than 100% solids epoxy. Higher-quality materials offer stronger adhesion, better chemical resistance, and greater wear life. This is one reason how long does epoxy coating last can vary so much from one project to another.
3. Installation Expertise
Installation quality matters as much as product quality. Experienced epoxy floor coating installers understand mixing ratios, cure windows, moisture testing, and environmental conditions. Skilled epoxy floor contractors help ensure the system bonds properly and performs for years.
4. Traffic and Usage
A residential garage with two passenger vehicles will place far less stress on the floor than a garage used for tool drops, jacks, machinery, or commercial use. Heavy traffic, frequent turning of tires, and dragging equipment can shorten floor life if the wrong coating is installed.
5. Moisture Issues
Moisture vapor from the concrete slab can break adhesion and ruin a coating system. If moisture is not tested and addressed before installation, even a strong-looking floor may fail early. This is a major issue in garages, basements, and older slabs.
6. Topcoat Protection
Topcoats improve UV resistance, stain resistance, and scratch resistance. In garages with sunlight exposure or heavy use, the topcoat can significantly extend service life. This becomes important in the debate around epoxy vs polyaspartic lifespan, since topcoat selection affects long-term performance.
Professional vs DIY Epoxy Flooring
Here is the honest comparison between DIY systems and professionally installed floors:
Factor
DIY Epoxy
Professional Epoxy
Lifespan
2 to 5 years
15 to 25+ years
Durability
Lower
Higher
Surface Prep
Limited
Mechanical grinding
Finish Quality
Basic
Premium
Upfront Cost
Lower
Higher
Long-Term Value
Lower
Better ROI
Hiring professional epoxy floor coating installers often costs more upfront, but it usually delivers better long-term value. A floor that lasts decades is far more cost-effective than one that needs early replacement.
Types of Epoxy Flooring Systems
Different systems serve different goals, and choosing the right one affects both appearance and lifespan.
Standard Epoxy Coating
A standard epoxy coating works well for many residential garages. It improves appearance, makes cleaning easier, and protects the concrete from stains and wear. This is often the entry point for homeowners exploring epoxy flooring.
Metallic Epoxy Flooring
Metallic epoxy flooring combines durability with a striking, high-end finish. It is a strong option for luxury garages, showrooms, and design-focused spaces. Metallic epoxy flooring offers visual depth and custom movement while still delivering surface protection when installed correctly.
Epoxy Urethane Mortar Flooring
Epoxy urethane mortar flooring is built for heavy-duty performance. This system is often used in demanding commercial and industrial environments where standard epoxy may not be enough. Epoxy urethane mortar flooring is valued for extreme durability, impact resistance, and long-term strength.
How to Make an Epoxy Garage Floor Last Longer?
A well-installed floor can last even longer with proper care.
Clean dust, dirt, and debris regularly
Wipe up oil, chemicals, and spills quickly
Avoid harsh cleaners that can wear down the finish
Use protective mats under parked tires or heavy equipment
Do not drag metal tools or sharp objects across the surface
Reapply a protective topcoat when needed, often around every 8 to 10 years depending on use
These simple steps can help protect appearance and extend the epoxy garage floor lifespan.
Signs an Epoxy Floor Needs Repair or Replacement
Over time, even a durable floor may begin showing wear. Common signs include:
Peeling or flaking
Yellowing or discoloration
Surface cracks
Dull or worn finish
Hot-tire pickup
Stains that no longer clean off easily
These problems do not always mean full replacement is needed, but they do signal that the floor should be inspected.
Is Epoxy Flooring Worth It?
In many garages, yes. Epoxy can protect concrete, improve appearance, reduce dust, simplify cleaning, and create a more finished space. When comparing cost against performance, a professionally installed floor often delivers strong long-term value. This is especially true when installed by experienced specialists who understand concrete preparation, moisture control, and system selection.
So, how long does epoxy garage floor last? In most cases, a professionally installed floor lasts 10 to 20 years, and high-performance systems can last 20 to 30+ years. The biggest difference usually comes down to surface preparation, material quality, and installer experience. That is why choosing skilled epoxy floor contractors is more important than simply choosing a product.
For a garage floor built for long-term performance, appearance, and durability, explore advanced epoxy flooring likemetallic epoxy flooring andepoxy urethane mortar flooring, or contact Old Stone Restoration & Installation Corp to discuss the right solution for the space.
FAQs
How long does an epoxy garage floor last?
Most epoxy garage floors last 10 to 20 years on average. With professional installation and high-performance systems, some floors can last 20 to 30+ years.
Does epoxy peel over time?
Epoxy can peel over time, but this usually happens when the floor was poorly prepared, moisture was ignored, or low-grade materials were used.
Is epoxy better than bare concrete?
Yes. Epoxy creates a more durable, stain-resistant, and easier-to-clean surface than bare concrete while also improving the overall look of the garage.
Can epoxy last 30 years?
Yes, it can. Some professionally installed, high-performance systems with strong topcoats and proper maintenance can last 30 years or longer.
What is the difference between epoxy vs polyaspartic lifespan?
The difference between epoxy and polyaspartic is that both can be durable, but lifespan depends on the full system, not just one product. Installation quality, prep work, slab condition, and topcoat performance all affect the result.
Is professional epoxy flooring better than DIY?
Yes. Professional epoxy flooring is better than DIY flooring. Professional installation usually means better surface preparation, stronger adhesion, thicker materials, and a much longer service life.
A stained, dusty, or worn garage floor can make the entire space look unfinished. Many property owners want a cleaner and more durable surface, but cost is often the first question. How much does it cost to epoxy a garage floor in 2026? Based on pricing guidance published on Old Stone Restoration’s website, epoxy flooring cost is approximately $3 to $12 per square foot, although the final number can vary depending on square footage, concrete condition, surface preparation, and the system selected. This page explains what goes into that price and what affects the overall cost of professional epoxy floor installation.
What Is Epoxy Garage Flooring?
Epoxy garage flooring is a coating system applied over properly prepared concrete to create a stronger, cleaner, and easier-to-maintain surface. A professionally installed garage epoxy floor can help protect against stains, tire marks, chemical exposure, and daily wear. It also gives the garage a more finished appearance than bare concrete.
For property owners comparing long-term flooring solutions,epoxy floor installation is often chosen for its durability, low maintenance, and visual improvement.
Approximate 2026 Epoxy Garage Floor Cost
In the year 2026 epoxy garage floors would cost around $3 to $12 per square foot. That means total project cost can land somewhere around the following ranges depending on the garage size and condition of the concrete.
Garage Type
Approximate Epoxy Cost
Notes
1-car garage
around $900 to $2,200
Smaller footprint, lower material usage
2-car garage
around $1,200 to $4,800
Common residential range
3-car garage
around $2,300 to $8,000+
More square footage and labor
However these costs are not the exact figure as some epoxy installers may charge higher or lower according to the size of the garage and location.
What Affects Epoxy Garage Floor Cost?
Garage Size and Layout
A larger garage usually requires more coating material, more labor, and more time. That increases the overall epoxy flooring cost, even if the cost per square foot remains within a similar range.
Concrete Surface Preparation
Prep work has a major impact on cost. If the slab has cracks, stains, moisture issues, or old coatings that need to be removed, the project may cost more. Surface prep is one of the most important parts of a lasting installation, which is why it should never be treated as an afterthought.
Type of Coating System
Not every epoxy system is priced the same. Some systems are simpler and more budget-conscious, while others are thicker, more decorative, or more specialized. As Old Stone Restoration states, pricing depends partly on the system used, which means the finish selected can directly affect the final quote.
Decorative Options and Custom Finishes
Decorative flakes, custom color combinations, and high-end finishes can increase cost. A standard solid-color coating may fall at the lower end of the range, while more premium looks can push pricing higher.
Professional Installation vs. Low-Cost Shortcuts
A lower quote is not always better value. In many cases, cheaper pricing reflects reduced prep work, thinner material application, or lower-grade products. That can affect both appearance and lifespan.
How are Cost of Epoxy Differentiated Between DIY vs. Professional Epoxy Floor Installation?
Feature
DIY
Professional
Upfront Cost
Usually lower
Usually higher
Surface Prep
Handled by homeowner
Included in scope
Finish Quality
Inconsistent
More uniform
Durability
Can vary
Generally stronger
Warranty
Rare
May be available
Risk of Failure
Higher
Lower with proper prep
DIY kits may look more affordable at first, but the long-term result depends heavily on prep quality and product selection. Professionalepoxy garage flooring is often the better choice for property owners who want a more polished finish and stronger long-term performance.
Metallic Epoxy Floor Cost and Value
Ametallic epoxy floor is a premium decorative option designed to create a marbled, dimensional look. Old Stone Restoration describes its metallic system as a custom floor finish made by blending metallic pigment into clear epoxy resin to create a three-dimensional appearance.
Because this system is more design-driven and labor-intensive, the price is often higher than a standard epoxy finish. Rather than assigning a fixed rate, it is more accurate to say that a metallic epoxy floor will generally cost more than a basic garage epoxy floor, especially when custom effects or multi-tone finishes are involved. A site visit and project-specific quote are usually the best way to price this type of floor accurately.
How to Get a More Accurate Quote
Before requesting an estimate, it helps to know:
Approximate square footage of the garage
Whether there are cracks, stains, or old coatings
Whether the floor needs repairs or grinding
Whether the finish should be standard or decorative
Whether a metallic system is being considered
It also helps to ask contractors what is included in the quote. A detailed estimate should clarify prep work, coating system, timeline, and finish level. This makes it easier to compare value instead of comparing price alone.
Upgrade Your Garage With a Floor Built to Last
A garage floor upgrade should be priced based on the actual condition of the concrete and the finish goals for the space. For property owners researching epoxy garage floors, garage epoxy floor systems, or premium decorative finishes, Old Stone Restoration provides solutions tailored to the project rather than a one-size-fits-all number. To get a more accurate 2026 estimate, contact Old Stone Restoration & Installation Corp for a quote based on the size, prep needs, and coating system best suited to the space.
FAQs
How much does it cost to epoxy a garage floor in 2026?
Based on pricing guidance published by Old Stone Restoration, epoxy flooring cost is approximately $3 to $12 per square foot. Final pricing can vary depending on garage size, prep work, and the coating system selected.
Is epoxy flooring worth the cost?
For many garages, yes. Epoxy can improve durability, make cleaning easier, and give the space a more finished look. The value usually depends on how well the floor is prepared and what system is installed.
How long does epoxy garage flooring last?
Lifespan depends on traffic, maintenance, and installation quality. A properly installed system on well-prepared concrete usually performs better and lasts longer than quick coatings or low-cost paint-style products.
Does a metallic epoxy floor cost more?
Yes, in most cases. A metallic epoxy floor is generally more expensive because it requires more craftsmanship and produces a more customized decorative finish.
What affects epoxy garage floor cost the most?
The biggest factors are usually square footage, concrete condition, amount of prep work, and whether the finish is standard or decorative. Old Stone Restoration specifically notes that pricing varies based on system used, surface preparation, and square footage.
A high-quality epoxy garage floor can last for years, but only if it’s finished with the right sealer. The topcoat you choose directly impacts durability, gloss, chemical resistance, and how well your floor holds up under daily wear. That’s why understanding what kind of sealer to use on an epoxy garage floor is essential before starting any project. In this guide, we break down the best options, how they work, and how to choose the right system for long-term performance.
What Is an Epoxy Garage Floor?
An epoxy floor coating is a resin-based system that bonds to prepared concrete and creates a hard, protective surface. Compared with standard floor paint, epoxy offers stronger adhesion, better impact resistance, and improved protection from chemicals, stains, and abrasion. Epoxy flooring is widely used because of its durability, adhesive strength, and easy maintenance.
For homeowners comparing systems, epoxy flooring for garage spaces is often chosen because it delivers both function and appearance. Old Stone Restoration & Installation Corp offers garage floor systems that are built for heavy use, chemical resistance, anti-skid options, and customizable finishes such as metallic, chip, quartz, and solid color systems. We also provide heavier-duty systems like epoxy and urethane mortars for demanding environments.
Why You Should Use a Sealer on Epoxy Floors
A sealer or topcoat is not just about extra shine. It is there to add another layer of garage floor protection. Depending on the product, a topcoat can improve scratch resistance, UV stability, chemical resistance, stain resistance, and ease of cleaning. Concrete Network explains that floor sealers can protect surfaces from abrasions and stains while also improving appearance.
Another reason sealers matter is moisture. Moisture vapor transmission through the slab can push upward and cause blistering, disbondment, or loss of adhesion in resinous flooring systems. Sherwin-Williams specifically warns that moisture vapor can damage coatings and that a properly selected moisture vapor barrier or mitigation layer can help prevent those failures.
Types of Sealers and Topcoats for Epoxy Garage Floors
Epoxy Topcoat
A clear epoxy topcoat is one of the most common options used over decorative garage coatings. It can add gloss, deepen color, and improve chemical and wear resistance. Rust-Oleum describes its premium clear garage floor coating as a durable, impact-resistant, high-gloss epoxy finish used over bare or coated concrete floors. For indoor garages where UV exposure is limited, a clear epoxy layer can be a strong choice.
Polyurea or Polyaspartic Clear Coat
If your garage gets sunlight or you want a faster return to service, a polyurea topcoat or polyaspartic clear coat is often the better choice. Polyurea and polyaspartic systems are excellent when quick return to service matters, and it specifically recommends a UV-resistant polyaspartic topcoat when the garage floor is exposed to direct sunlight. Polyaspartic topcoats are often used to reduce yellowing and provide extra protection over the base system.
Penetrating Concrete Sealer
A penetrating concrete sealer is different from a film-forming topcoat. It is usually used on bare concrete, not as the visible finish layer over epoxy. Penetrating sealers are designed to move into the concrete and protect against moisture intrusion while keeping a natural look.
They are commonly used where invisible protection is desired and are especially valuable against moisture and freeze-thaw exposure. In some projects, moisture-mitigation products or penetrating prep systems are used before the epoxy system to improve long-term performance.
Avoid Incompatible Sealers
Not every garage floor sealer works under or over epoxy. Some existing sealers can interfere with bonding, and certain water-repellent or incompatible products can lead to adhesion problems. Improper substrate preparation is a leading cause of coating failure, so it’s important to check for moisture or prior sealers before coating concrete.
How to Choose the Best Sealer for Epoxy Flooring for Garage
When deciding on the best epoxy sealer for garage use, focus on five things:
Compatibility with epoxy: The topcoat has to be designed to work with the underlying epoxy system. Poor compatibility can lead to peeling or delamination.
Abrasion and impact resistance: Garages deal with tires, dropped tools, and foot traffic.
UV and chemical resistance: If sunlight reaches the floor, a polyaspartic topcoat is usually stronger than a standard epoxy clear coat for UV stability.
Moisture management: If the slab has moisture issues, you may need a primer or moisture vapor barrier below the system.
Finish and slip resistance: Gloss, satin, and textured finishes all affect maintenance and safety. Some systems can also include anti-slip additives. We offer anti-skid options for garage floors.
A Quick Comparison
Sealer Type
Finish & Appearance
Key Benefits
Best Use Case
Limitations
Epoxy Clear Topcoat
High-gloss, smooth
Durable, strong chemical resistance, enhances color
Indoor garages with low UV exposure
Can yellow over time with sunlight
Polyurea / Polyaspartic Topcoat
Gloss to satin options
Fast curing, excellent UV resistance, highly durable
Active garages, areas with sunlight exposure
Higher cost, requires precise application
Penetrating Sealer
Natural / invisible finish
Protects against moisture, improves adhesion
Concrete prep or moisture-prone slabs
Not a decorative top layer over epoxy
Step-by-Step Sealer Application Tips
A durable system starts with surface preparation. Our installation process includes site evaluation, moisture checks, diamond grinding or shot blasting, concrete repair, primer application, system installation, and topcoat application. That process aligns with wider industry best practices.
A basic sequence looks like this:
Clean and degrease the floor thoroughly.
Test for moisture and existing sealers.
Diamond grind or mechanically prep the slab.
Repair cracks, pits, and damaged areas.
Apply primer or moisture-control layer if needed.
Install the epoxy floor coating.
Finish with the right epoxy topcoat or polyurea/polyaspartic clear coat.
Add anti-slip media if safety is a concern.
Respect cure times before foot or vehicle traffic.
Common Mistakes to Avoid
The biggest mistake is skipping moisture testing. Moisture vapor is one of the leading causes of coating failure. Another common issue is coating over dirty concrete, old sealers, or poorly prepared surfaces. In fact, improper surface preparation is a top reason epoxy floors fail. Using the wrong product on the wrong system is another avoidable mistake.
Maintenance Tips After Sealing
Once your floor is sealed, maintenance is simple but important. Regular sweeping and mopping with a mild or pH-neutral cleaner usually keeps epoxy floors looking good. We give similar care guidance for our epoxy and urethane mortar systems, advising regular cleaning and caution with abrasive cleaners. If the finish starts losing gloss, showing scratches, or wearing through in traffic paths, it may be time to consider recoating.
DIY vs. Professional Installation
A small garage and a straightforward concrete slab may be manageable for a skilled DIY installer, but long-term performance depends heavily on prep, moisture testing, and product compatibility. Professional installation reduces the risk of adhesion problems and coating failure. Old Stone Restoration & Installation Corp provides garage floor systems built for durability, anti-skid safety, and fast return to use, along with specialty epoxy and urethane mortar systems for tougher environments.
Conclusion
The best answer to “what kind of sealer to use on epoxy garage floor” depends on the floor’s exposure, moisture conditions, and performance needs. A clear epoxy topcoat can work well for indoor decorative floors. A polyurea or polyaspartic topcoat is often better where UV resistance and faster cure matter. If moisture is a concern, a proper moisture vapor barrier or mitigation layer may be essential before the coating system ever goes down.
For professionally installed epoxy flooring for garage spaces and more advanced resin systems, Old Stone Restoration & Installation Corp offers garage floor solutions as well as epoxy and urethane mortar systems tailored to demanding conditions. Call us at (631) 821-5619 to discuss your needs.
FAQs
Can you put a sealer over epoxy garage floor?
Yes. Many systems use a clear topcoat over epoxy for added protection, gloss, UV resistance, or easier cleaning, but the topcoat must be compatible with the epoxy underneath.
What is the difference between a sealer and a topcoat?
A sealer is a broad term. A topcoat usually refers to the final protective finish layer over the system. A penetrating sealer, by contrast, is usually used within or before the system on concrete rather than as the visible decorative finish.
How long does epoxy sealer last on a garage floor?
It depends on traffic, prep quality, and the product used. In general, professionally installed systems last longer because the surface preparation and product selection are better controlled.
Is penetrating sealer needed before epoxy?
Not always. But if the slab has moisture-related concerns, a moisture-control or mitigation layer may be needed before the epoxy system to reduce the risk of blistering and adhesion failure.
When people want to protect concrete floors, two popular choices come up — polyaspartic and epoxy. Many homeowners and business owners ask one simple question: Which one lasts longer?
This guide explains everything in very simple language. By the end, you will clearly understand which coating may be better for your floor and why.
What Is Polyaspartic Floor Coating?
Polyaspartic is a newer type of floor coating. It is designed to be strong, flexible, and long lasting. It also dries very fast, sometimes in just a few hours.
Polyaspartic coatings are known for:
Strong resistance to chemicals and scratches
UV resistance (does not turn yellow in sunlight)
Flexibility, which helps prevent cracks
Long lifespan with low maintenance
Studies show polyaspartic coatings often last 10–20 years or more when installed properly.
What Is Epoxy Floor Coating?
Epoxy is a very popular and older floor coating system. It creates a hard, protective layer on top of concrete.
Epoxy is known for:
Strong surface hardness
Good value for money
Smooth and glossy finish
Good protection for indoor floors
However, most epoxy floors last around 5–10 years, depending on use and installation quality.
Polyaspartic vs Epoxy Floor Coating: Which Lasts Longer?
Average Lifespan Comparison
Epoxy: About 5–10 years (sometimes less in heavy traffic areas)
Polyaspartic: About 10–20+ years
This means polyaspartic can last almost double or even triple in some cases.
Why Polyaspartic Floors Usually Last Longer
1. Better Flexibility
Concrete expands and shrinks with weather changes. Epoxy is hard but not flexible. Polyaspartic is flexible and moves with concrete, reducing cracks.
2. Strong UV Protection
Epoxy can turn yellow in sunlight. Polyaspartic stays clear and strong even outdoors.
3. Higher Chemical and Scratch Resistance
Polyaspartic handles chemicals, oils, and heavy traffic better over time.
When Epoxy Might Still Be a Good Choice
Even though polyaspartic lasts longer, epoxy is still useful.
Epoxy works well if:
You want a budget-friendly option
The floor is indoors
Traffic is moderate
UV exposure is low
Many homes still use epoxy successfully for garages and basements.
Does Installation Quality Affect Lifespan?
Yes — this is very important.
Even the best coating can fail if:
Surface is not prepared correctly
Moisture is trapped in concrete
Cheap materials are used
Installer lacks experience
Professional installation can add many years to coating life.
Cure Time Difference (Why It Matters)
Polyaspartic dries much faster:
Epoxy: 24–72 hours or more
Polyaspartic: 2–24 hours
Fast curing means less downtime for homes and businesses.
Maintenance Differences
Polyaspartic:
Very low maintenance
Resists stains and moisture
Epoxy:
May need recoating earlier
Can chip or stain over time
Polyaspartic floors usually stay looking new longer.
Real Answer: Which Floor Coating Should You Choose?
Choose Polyaspartic if:
You want the longest lifespan, outdoor use, or heavy traffic durability.
Choose Epoxy if:
You want a cost-effective indoor flooring solution.
The best choice depends on your budget, usage, and environment.
About Our Experience
At Old Stone Restoration & Installation Corp, flooring and surface restoration is not new to us. Our company has been family owned and operating since 1990 and has served customers for over 35+ years. We have worked with materials like stone, terrazzo, polished concrete, and epoxy flooring across residential and commercial projects.
This long experience helps ensure proper surface preparation, correct material selection, and long-lasting results for every project.
If you are considering polyaspartic floor coating vs epoxy, our team can help you choose the right system based on your floor condition and usage needs.
If you only compare lifespan, polyaspartic usually wins. But epoxy is still a great choice for many indoor floors. The most important factor is professional installation and proper surface preparation.
When installed correctly, both coatings can protect your floor for many years.
FAQs
How long does polyaspartic floor coating last?
Usually 10–20 years or more with proper installation and maintenance.
How long does epoxy floor coating last?
Most epoxy floors last about 5–10 years depending on traffic and care.
Is polyaspartic better than epoxy?
For lifespan, UV resistance, and flexibility — yes. But epoxy is still good for budget indoor projects.
Is polyaspartic more expensive than epoxy?
Yes, usually. But it may save money long term because it lasts longer.
Can epoxy last 20 years?
Sometimes, but usually only in low-traffic areas with perfect installation and maintenance.
Thinking about an Industrial epoxy floor contractor? Great choice! Epoxy creates a seamless, durable surface that resists stains, chemicals, and wear. The secret to a long‑lasting finish is preparation. Here’s how to get your floor ready and what to expect from start to finish.
Before You Start: Check Conditions and Gather Tools
Concrete age and condition: New pours should cure at least 28 days. Epoxy bonds best to clean, sound, dry concrete.
Tools and supplies: Vacuum with fine dust filter, stiff brooms, mop, floor grinder or etching supplies, crack/patch materials, squeegee, 3/8″–1/2″ nap rollers, mixing buckets, drill/paddle, tape, plastic sheeting, gloves, eye protection, respirator.
Temperature and humidity: Most epoxies prefer 60–80°F and moderate humidity. Follow your product’s technical data sheet.
Step‑by‑step Surface Preparation
Step 1: Clear the space: Remove all items. Mask baseboards, walls, thresholds, and drains.
Step 2: Check for sealers/contaminants:
Water test: If water beads, there’s sealer or oil that must be removed.
Removal: Mechanical grinding or shot‑blasting is most reliable. If you acid‑etch, neutralize and rinse thoroughly. Aim for CSP 2–3 profile.
Step 3: Degrease thoroughly:
Use an alkaline degreaser on oil spots; scrub and rinse until water runs clear.
Stubborn oil may require poultice products or additional grinding.
Step 4: Verify moisture:
Do a taped plastic sheet test (2’×2′ for 24 hours) or use calcium chloride/in‑slab RH testing.
If moisture is high, use a moisture‑mitigation epoxy primer or address vapor issues first.
Step 5: Repair defects:
Fill cracks, spalls, and divots with compatible epoxy or polyurea patch compounds.
Feather edges are smooth. Do not rigidly fill active control/expansion joints; honor them or use flexible joint material later.
Step 6: Profile and clean:
Grind or etch to open pores.
Vacuum meticulously; residual dust can cause peeling.
Wipe with a manufacturer‑approved, solvent‑free cleaner if specified
What To Expect During The Process
Mixing and pot life:
Epoxy is two‑part; measure and mix precisely.
Observe any induction time and watch pot life, warmer temps shorten working time. Mix manageable batches.
Primer coat:
Improves bond, reduces pinholes, and helps with outgassing.
Apply with a squeegee and backroll evenly. Use de‑foaming rollers if recommended.
Base coat and decorative flakes (optional):
Roll the base coat in sections, maintaining a wet edge.
Broadcast flakes “to rejection” while wet. After cure, scrape and vacuum excess.
Topcoat:
Seal with clear epoxy, polyurethane, or polyaspartic for UV, scratch, and chemical resistance.
Add anti‑slip aggregate for wet areas. Crisscross backrolling helps avoid holidays and roller marks.
Cure times:
Light foot traffic: 12–24 hours.
Replace items: 48–72 hours.
Vehicle traffic: 3–7 days (product and conditions vary).
Keep temperatures stable; avoid washing or covering during early cure.
Odor, noise, and dust:
Expect grinder noise and some dust during prep (use quality vacuums).
Coatings can have noticeable odor, So, ventilate and use PPE
Common Pitfalls To Avoid
Coating over moisture, oil, or sealer contamination.
Skipping mechanical profiling or inadequate cleaning.
Working outside the product’s temperature/humidity range.
Missing recoat windows or over‑rolling partially cured epoxy. Ignoring control/expansion joints.
Precautions and Aftercare
Sweep and mop with a neutral cleaner; avoid harsh acids and abrasives.
Use mats at entries and under kickstands or jacks to prevent point loading.
Re‑topcoat as needed to refresh gloss and protection.
With careful prep and realistic expectations about timeline and cure, you’ll get a tough, great‑looking epoxy floor that lasts. Always follow your specific product’s technical data for best results.
Ready To Explore Epoxy Coating For Your Floor?
Contact our expert team today: call (631) 821-5619 or email info@oldstonerestoration.com. We’ll provide a free site evaluation, walk you through the epoxy system and finish options (solid color, flake, quartz, metallic, anti-slip) and connect you with trusted epoxy flooring contractors and certified installers. Let’s get your floors protected and optimized for longevity, performance, and value.
Selecting the right flooring system is a critical decision that impacts your facility’s safety, efficiency, and bottom line. Two of the most dominant options in commercial and industrial spaces are epoxy flooring and polished concrete. Each offers a powerful blend of durability and aesthetics, but they serve different operational needs. In this guide, we’ll explore both the options to help facility managers, property owners, and business executives identify the best solution based on cost, performance, and long-term value.
What Is Polished Concrete?
Polished concrete is created through a refined mechanical process that grinds, hones, and polishes an existing concrete surface. The slab is densified and sealed to enhance hardness and reflectivity, resulting in a smooth, glossy, and dust-free finish.
The result is a sophisticated surface that maximizes light reflection, reduces allergens, and complements a modern industrial aesthetic. Polished concrete transforms your existing slab into a long-lasting, low-maintenance surface ideal for high-traffic environments.
What Is an Epoxy Floor System?
An epoxy floor system is a multi-layer protective coating applied directly to concrete. It typically involves surface preparation, a primer, a base coat, optional decorative flakes or metallics, and a final topcoat engineered for durability and design.
Epoxy systems provide a seamless, non-porous finish that enhances safety and cleanliness. With a wide range of color options, finishes, and textures, epoxy flooring allows facilities to reflect their brand identity while meeting functional requirements for chemical resistance, slip resistance, and long-term wear.
Epoxy Flooring vs. Polished Concrete: A Comparison
Feature
Polished Concrete
Epoxy Flooring
Initial Investment
Cost-effective when the slab is in good condition
Competitive pricing that includes materials and coatings
Durability
Excellent abrasion resistance
Outstanding impact and chemical resistance
Maintenance
Minimal upkeep; easy to clean
Low maintenance; smooth surface resists dirt and moisture
Slip Resistance
Naturally smooth; optional anti-slip finish
Customizable with slip-resistant additives
Aesthetic Options
Clean, modern, high-gloss industrial look
Unlimited colors, textures, metallics, and branding designs
Application Settings
Ideal for retail, offices, and showrooms
Perfect for industrial, manufacturing, and healthcare facilities
Longevity
Extended lifespan with routine care
Long-lasting performance with proper maintenance
Both polished concrete and epoxy flooring enhance functionality, protect your investment, and elevate the overall aesthetic of your space.
Matching the Floor to Your Facility’s Needs
Polished Concrete Can Work For:
Retail stores, offices, and lobbies
Warehouses and showrooms seeking a bright, minimalist aesthetic
Facilities prioritizing reflectivity and clean, open design
Epoxy Flooring Can Be Ideal For:
Manufacturing and industrial plants
Hospitals, laboratories, and clean rooms
Food and beverage processing areas
Parking garages, workshops, and loading docks
Environments requiring chemical and impact resistance with design flexibility
Why Your Flooring Choice Is a Foundational Business Decision
Your flooring is more than just a surface; it’s a long-term asset that influences safety, productivity, and cost efficiency. The right flooring supports your business operations while reflecting your company’s professionalism and brand image.
A well-installed system enhances workflow, resists wear, and improves lighting efficiency, creating a safer, brighter, and more comfortable workspace. Durable floors also reduce maintenance downtime and protect against everyday operational stress, delivering consistent performance year after year.
From heavy machinery to high foot traffic, both epoxy flooring and polished concrete are designed to keep your facility running smoothly and looking exceptional. Investing in a high-quality flooring system is a strategic investment in your company’s success and longevity.
Partner with Old Stone Restoration
At Old Stone Restoration & Installation Corp, every flooring project begins with understanding your facility’s environment, operational requirements, and aesthetic goals. Whether you’re drawn to the modern elegance of polished concrete or the customized performance of an epoxy floor system, our experienced team delivers solutions that align with your business needs.
Ready to find the perfect flooring solution? Call us at (631) 821-5619 to discuss your needs.

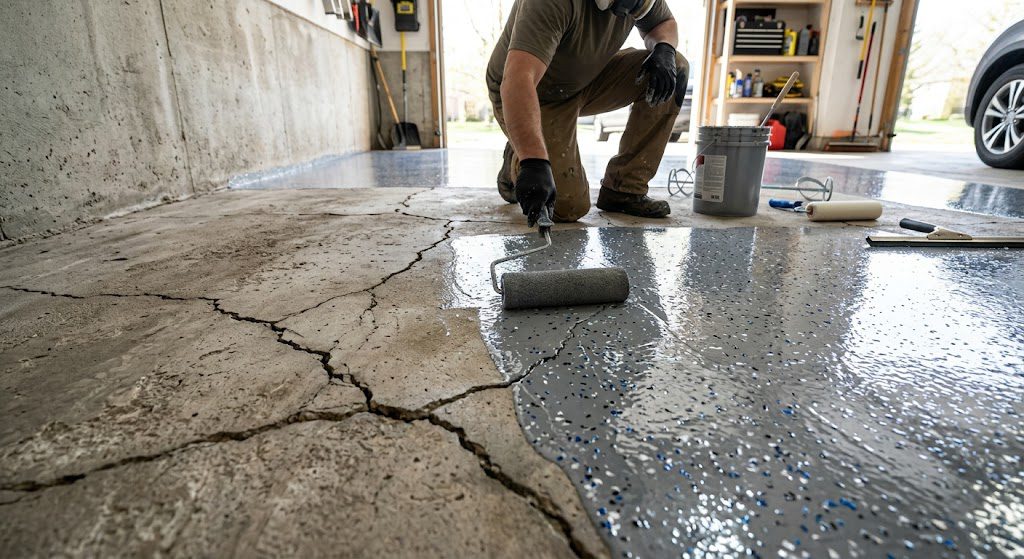
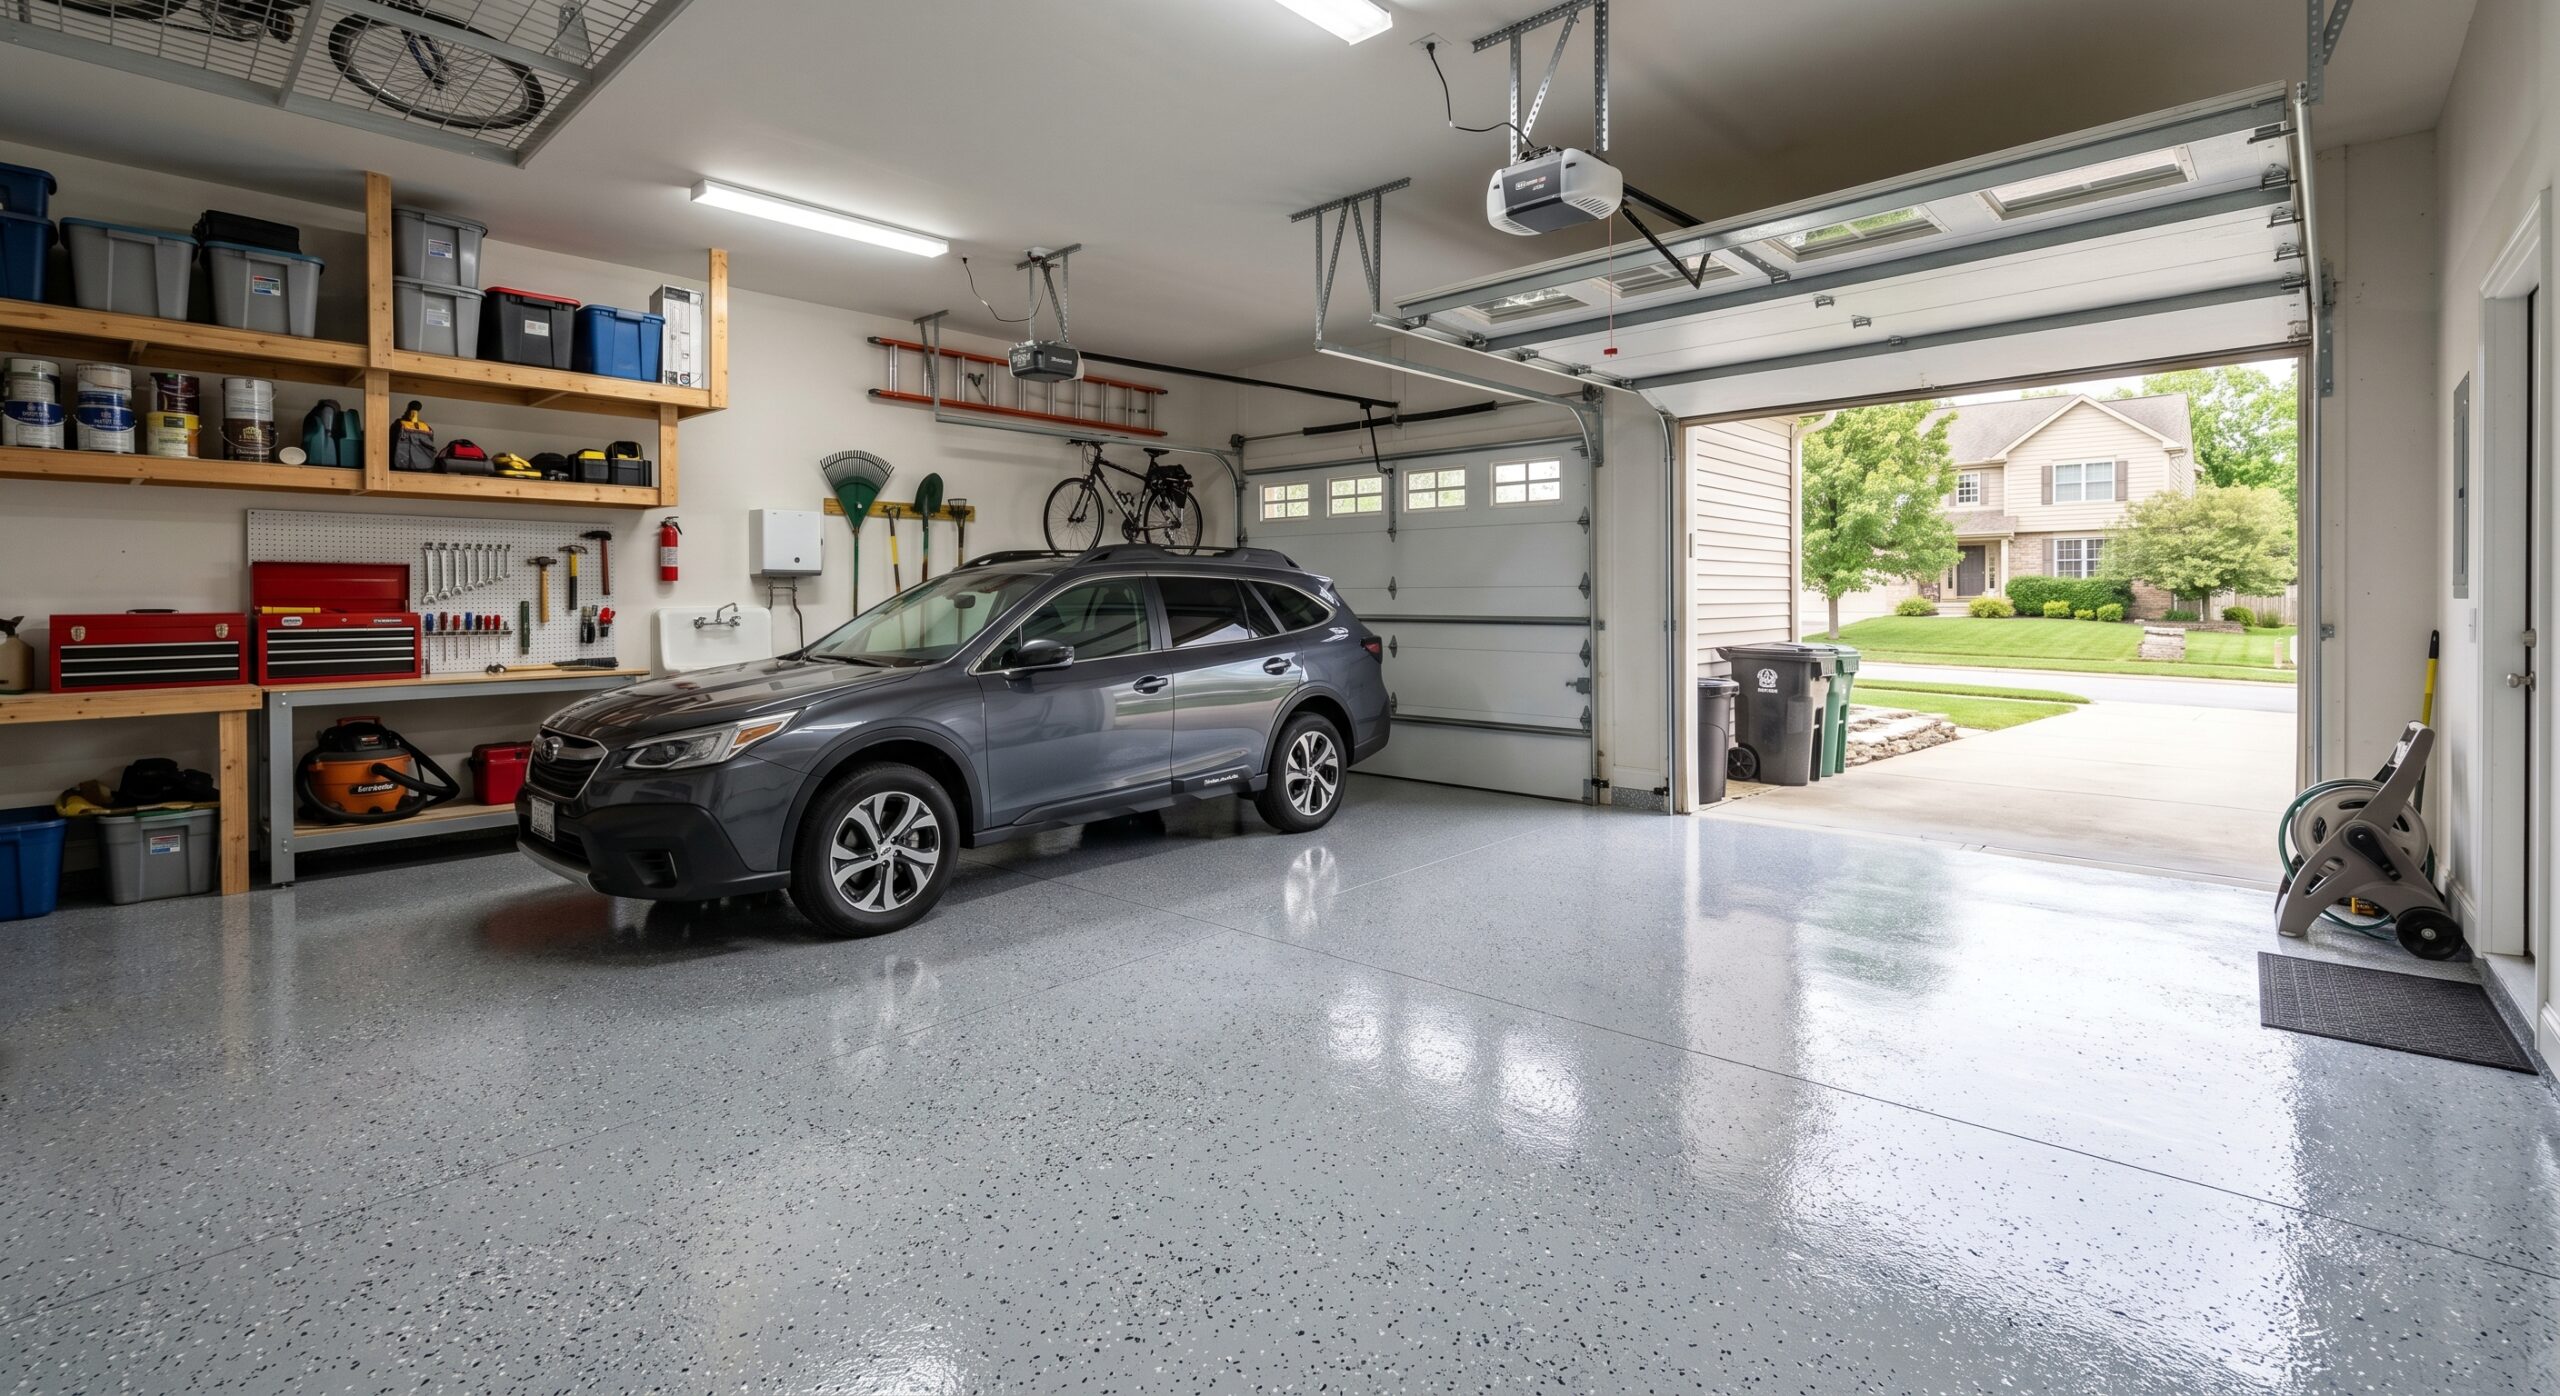
 1")
 2")
 3")
 4")