An epoxy floor was installed by you. First impressions were good. Then, a few months later, you noticed something wrong. A corner is starting to lift. A bubble forming near the garage door. Flakes breaking off where your car sits every night. What started as a clean, polished surface now looks worse than the bare concrete underneath.
Most people do not realize: peeling epoxy is just a surface problem. It almost always points to something that went wrong deeper down, whether that is moisture pushing up through the slab, a preparation step that was skipped, or a coating product that simply was not built for the conditions it faced.
At Old Stone Restoration and Installation Corp, our team has spent 35 years diagnosing and repairing concrete and resin flooring systems across Long Island and beyond. This blog walks you through everything: what peeling looks like, why it happens, and how to fix it properly the first time.
What Does Epoxy Floor Peeling Look Like?
Epoxy failure does not happen in one night. Usually, it starts small and spreads if nothing is done about it. Knowing what to look for early can save you from a full floor replacement down the line.
The common signs of epoxy floor peeling include:
- Flaking: Small chips or thin sheets of coating breaking away from the surface, often near high traffic areas
- Bubbling: Dome shaped raised areas where the coating has lifted off the concrete but not yet broken apart
- Edge lifting: The coating peeling back along walls, doorways, or transitions, usually the first sign of adhesion failure
- Sheet delamination: Large sections of coating coming away in one piece, which typically signals a serious moisture or prep issue
If you are seeing more than one of these at once, the floor is telling you something important. The sooner you address it, the less work the repair will involve.
Why Is Your Epoxy Floor Peeling?
This is where most generic advice falls short. People are told to “just recoat it” without anyone explaining why the first coat failed. Applying new epoxy over a failed surface without fixing the root cause almost guarantees the same result within months. Here are the real reasons epoxy floors peel.
1. Poor Surface Preparation
This is the single most common cause of epoxy failure, and it accounts for the majority of coating problems we see. Epoxy needs a clean, open, properly profiled surface to bond with. When the slab is only acid etched or left dusty after grinding, the epoxy sits on top rather than bonding into the concrete. At first, it looks fine, but under traffic and temperature changes, it separates.
2. Moisture Vapor Coming Through the Concrete
Concrete is porous. Water in the ground below can travel up through the slab as vapor, especially in basements and ground floor slabs. When that vapor has nowhere to go because a coating is sealing the surface, it builds pressure underneath the epoxy and pushes the coating up. This is called hydrostatic pressure, and it is responsible for a large portion of bubbling and full sheet delamination cases.
3. Oil, Grease, and Surface Contamination
In garages and workshops, oil and grease soak into concrete over years of use. Even after cleaning, residue can remain deep in the surface. Epoxy cannot bond through contamination. If the floor was not degreased and mechanically cleaned before coating, those contaminated spots become weak points where peeling begins.
4. Hot Tire Pickup in Garage Floors
This is a problem unique to residential and light commercial garages. When a vehicle has been driven and its tires are hot, parking it on an epoxy floor transfers significant heat to the coating. Standard epoxy softens under that heat, and when the car is moved, the tires pull the coating with them. Over time, this creates the striped peeling pattern you often see in garage installations.
5. Low Quality DIY Epoxy Kits
The kits sold at big box stores are typically water based, thinner, and formulated for general use. They do not have the bonding strength, film build, or chemical resistance of professional grade systems. They also come with minimal surface prep guidance, which means most people skip steps they do not know matter. The result looks acceptable for a season, then starts breaking down.
6. Incorrect Mixing Ratio or Cure Time
Epoxy is a two part system. The resin and hardener need to be combined in an exact ratio and mixed thoroughly. If the ratio is off even slightly, or if the mixed product is applied before or after its working window, the chemistry does not complete properly. The result is a coating that never fully cures, stays soft, and peels under load.
How to Diagnose the Real Cause Before Repairing?
Before you spend a dollar on materials or labor, match what you are seeing to the likely cause. This table gives you a starting framework.
| Symptom | Likely Cause | Repair Type | Urgency |
| Peeling near tire marks | Hot tire pickup | Spot repair or full recoat | Medium |
| Bubbling across large areas | Moisture vapor / hydrostatic pressure | Full system removal | High |
| Lifting along edges or seams | Poor surface prep | Diamond recoat | Medium |
| Random scattered flakes | Surface contamination | Surface remediation + recoat | Low to Medium |
| Widespread sheet delamination | Multiple failures combined | Full replacement | High |
If your situation involves multiple symptoms at once, the repair scope will likely be larger. A professional assessment will give you a clearer picture before work begins.
How to Fix Epoxy Floor Peeling (Step by Step)
The right repair process depends on the extent and cause of the failure. Here is what a proper remediation looks like from start to finish.
Step 1: Test the Extent of Failure
Walk the floor and tap it with a coin or hammer. A hollow sound indicates delamination beneath the surface even where the floor looks intact. Mark all affected areas. This helps you determine whether spot repair is viable or whether full removal is the more practical path.
Step 2: Remove All Loose Coating
Any coating that has separated or is close to separating needs to come off completely. This involves using floor grinders, hand scrapers for detailed areas, and in more severe cases, shot blasting equipment that removes coating uniformly across the slab. Leaving compromised material in place and coating over it is one of the most common mistakes made during DIY repairs.
Step 3: Repair Surface Damage
Once the loose coating is removed, inspect the concrete for cracks, pits, and spalling. These need to be filled with a compatible concrete repair mortar and allowed to cure fully before any new coating is applied. Skipping this step means visible defects will telegraph through the new surface.
Step 4: Diamond Grind the Slab
The entire repair area, and ideally the full floor, needs to be mechanically ground using a diamond grinder. This opens the pores of the concrete, removes any remaining contamination, and creates the surface profile that epoxy needs to bond properly. Grinding is not optional for a repair that is meant to last.
Step 5: Conduct Moisture Testing
Before any coating goes down, test the slab for moisture vapor transmission. A calcium chloride test or an in situ relative humidity probe will tell you whether moisture is a factor. If it is, a moisture mitigating primer or barrier coat needs to be applied first. Skipping this step after a moisture related failure means the same thing will happen again.
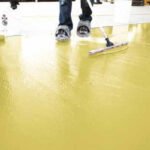
Step 6: Apply New Primer and Coating System
Once the surface is clean, dry, and properly profiled, the new system can go down. This typically involves a penetrating epoxy primer, one or more build coats, and a durable topcoat. Product selection should be based on the specific use case: a garage floor has different demands than a commercial kitchen or an industrial warehouse.
According to ICRI guidelines, concrete surfaces must be mechanically prepared to achieve the proper surface profile before epoxy installation.
When Spot Repairs Work vs. When You Need Full Replacement?
This is one of the most common questions we get, and the honest answer depends on the percentage of the floor affected and the root cause.
Spot repair is a reasonable option when less than 20 percent of the floor is affected, the cause is localized such as a single contamination area or isolated hot tire damage, and the surrounding coating is still firmly bonded to the slab.
Full system replacement becomes the recommended path when 25 to 30 percent or more of the floor has delaminated, the cause is moisture vapor, or the existing coating is more than 10 years old and showing general wear alongside localized failure.
Choosing spot repair when full replacement is warranted is a short term fix. The surrounding coating will continue to fail, and you will be back to the same situation within a year or two.
Why Garage Epoxy Floors Peel More Often?
Garages are genuinely harder environments for epoxy than most people expect. A residential garage floor deals with conditions that would challenge even well applied coatings over time.
- Vehicle heat: Engines and tires transfer heat to the floor repeatedly, stressing the coating bond over time
- Road salt tracking: In colder months, salt carried in on tires is chemically aggressive and can degrade certain coating systems from the surface down
- Rainwater and humidity: Wet vehicles dripping onto the floor introduce moisture, and if the slab has any vapor transmission issues, this compounds the problem
- Freeze and thaw cycles: In climates like Long Island, the ground contracts and expands seasonally, and concrete slabs move with it. Coatings that are not flexible enough crack and lift along with that movement
These factors combined mean that garage epoxy floor restoration needs to be chosen carefully and installed correctly from the beginning. A standard DIY kit is rarely adequate for a working garage.
The American Society of Concrete Contractors notes that improper surface preparation and moisture vapor transmission are among the leading causes of coating failure in concrete flooring systems.
Best Long Term Solution for Severely Damaged Floors
When a floor has failed repeatedly, or when the environment is particularly demanding, standard epoxy may not be the right product for the job. This is where higher performance systems come into play.
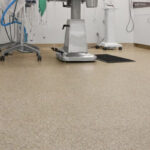
For example, Urethane mortar systems are significantly thicker than standard coatings and are designed for environments with moisture, thermal shock, and heavy loads. They bond to concrete even in higher moisture conditions and are widely used in commercial kitchens, food processing facilities, warehouses, and industrial epoxy repairs where standard epoxy systems fail.
At Old Stone Restoration and Installation Corp, we install epoxy and urethane mortar flooring systems built for spaces that demand more than a basic coating can offer.
For homeowners with recurring garage floor issues, a professional grade epoxy system with a proper moisture barrier and a polyurea or polyaspartic topcoat will dramatically outlast anything available at a hardware store.
How to Prevent Epoxy Floor Peeling in the Future?
Getting the installation right from the beginning is far less expensive than repairing a failure. Here is what proper prevention looks like:
- Always conduct moisture testing before any coating is applied
- Use mechanical grinding or shot blasting, not acid etching alone, to prepare the surface
- Select a primer that is compatible with your slab conditions and the topcoat product
- Allow full cure time before opening the floor to traffic, even if the surface feels dry
- Use traffic protection (plywood or mats) during the first week after installation in heavy use areas
- Choose a topcoat rated for hot tire resistance in garage applications
- Have the installation done by a contractor who offers a written process, not just a price
DIY vs. Professional Epoxy Floor Repair
| DIY Epoxy Repair | Professional Epoxy Repair |
| Lower upfront cost | Longer lifespan with proper installation |
| Risk of repeating the same failure | Root cause diagnosed before any work begins |
| Limited to basic tools and kits | Industrial equipment including shot blasters and grinders |
| No moisture testing capability | Moisture vapor testing done before coating |
| Often voids manufacturer warranties | Work backed by experience and guarantees |
| Temporary fix in most failure cases | Permanent solution suited to the actual problem |
The upfront cost difference between DIY and professional repair is often less than people expect, especially when you factor in the cost of a second failure and having to redo the work entirely.
Why Property Owners Trust Old Stone Restoration and Installation Corp?
Choosing the right contractor for epoxy floor repair is not just about finding someone with the equipment. It is about working with people who understand why floors fail and how to make sure the repair actually holds.
Old Stone Restoration and Installation Corp has been serving residential, commercial, and industrial clients across Long Island for over 35 years. Our work covers everything from single car garages to large scale commercial facilities, and our process is built around diagnosing the real problem before recommending any solution.
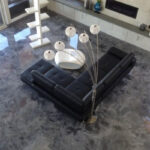
We offer epoxy flooring service for surface diagnostics that identify moisture, contamination, and prep failures before any work begins. Our team uses professional grade equipment including diamond grinders and shot blasters for proper surface preparation. Among the coating systems we install are epoxy, moisture-mitigating primers, decorative flake and metallic systems, quartz broadcast flooring, and high-performance urethane mortars.
Every project starts with an honest assessment. If a spot repair will hold, we will tell you. If the floor needs full replacement, we will explain why before you commit to anything.
FAQs
Can peeling epoxy floors be repaired?
Yes, in many cases they can. Spot repairs or system replacements may be appropriate depending on the extent of damage and what caused it. Floors with less than 20 percent of the coating has delaminated are often good candidates for targeted repair. Larger failures or those caused by moisture require full removal and reinstallation.
Why is my epoxy garage floor peeling under my tires?
This is almost always hot tire pickup. When car tires are warm from driving, they transfer heat to the epoxy surface. Standard epoxy softens under that heat, and the tire pulls the coating away when the car is moved. The fix involves removing the failed coating, preparing the slab properly, and applying a topcoat designed to resist thermal stress.
Can you epoxy over peeling epoxy?
No. Applying new epoxy over a surface that is already delaminating will not solve the problem and it will peel again. All loose and compromised material must be fully removed and the slab properly prepared before any new coating can be applied.
How long should epoxy flooring last?
A professionally installed epoxy system in a residential garage or basement should last 10 to 20 years with proper maintenance. In commercial or industrial environments with heavier traffic, a high performance system can last a similar duration when the right product is selected for the conditions.
Does moisture cause epoxy floor failure?
Yes, moisture is one of the leading causes of epoxy failure. When water vapor moves up through a concrete slab and cannot escape because the surface is sealed, it creates pressure beneath the coating that causes bubbling and delamination.